Little Quilt Blankets
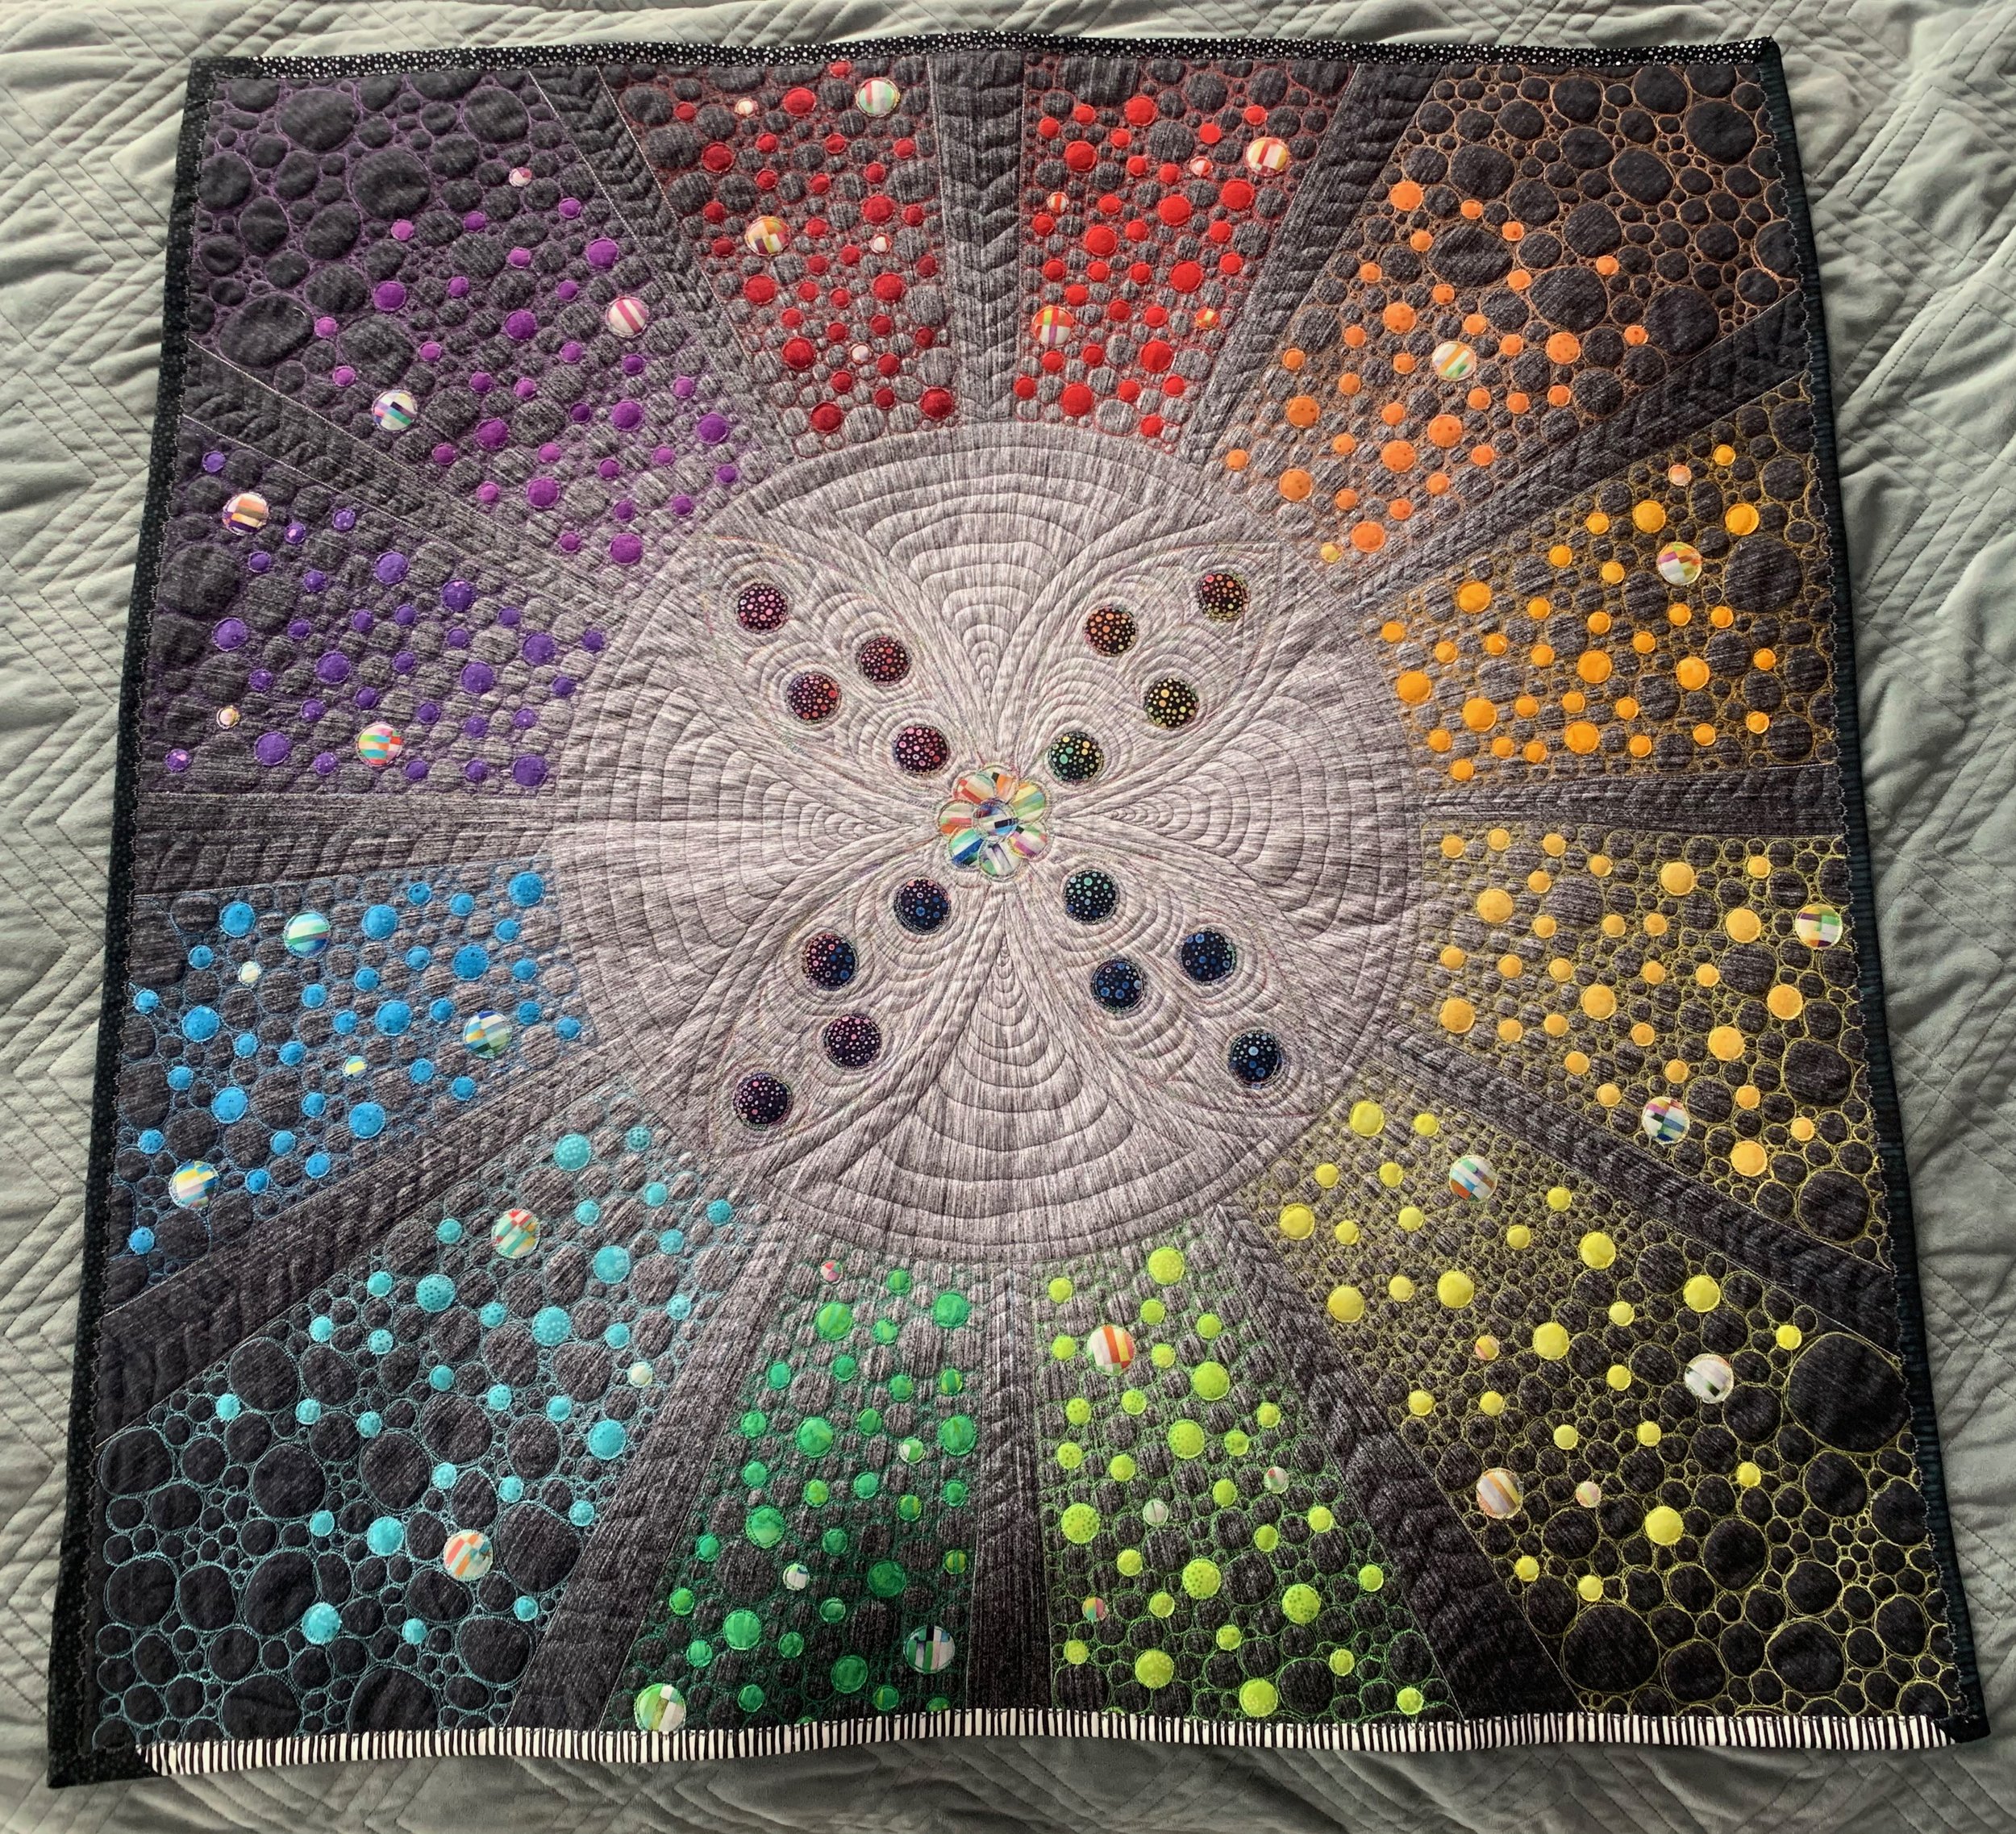
Finished and bound front of my nephew’s blanket
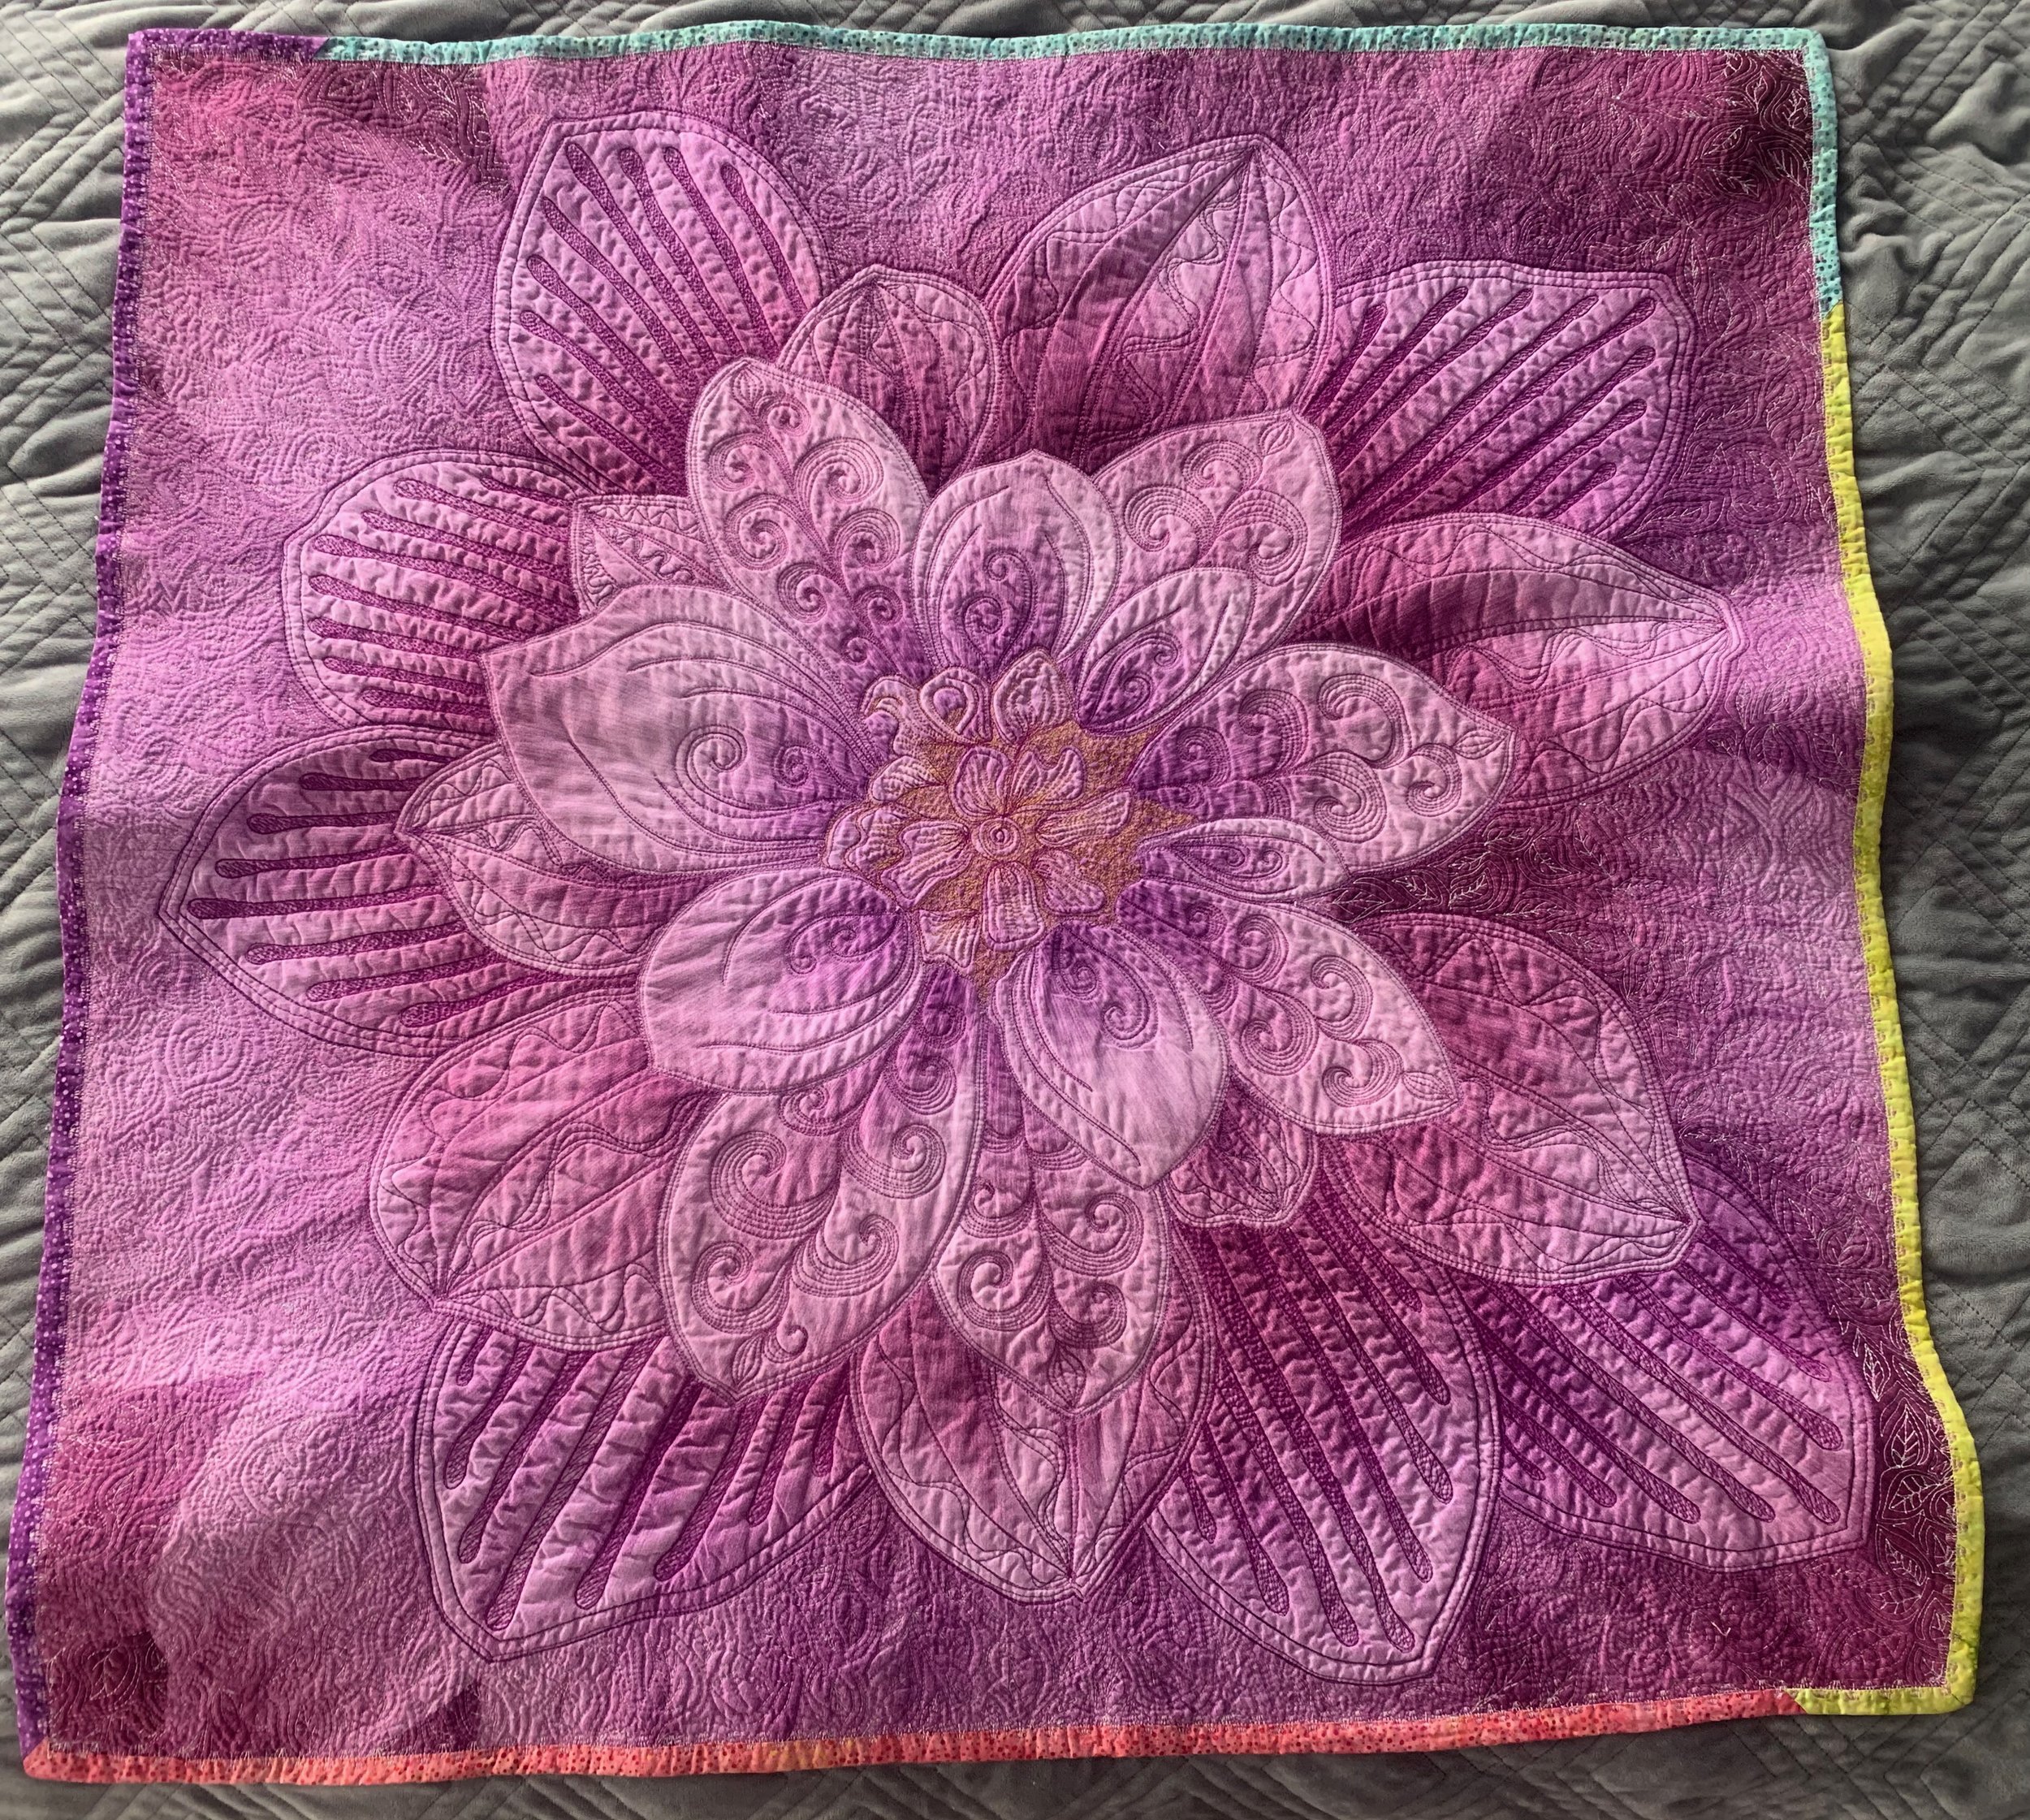
Finished and bound front of my niece’s blanket
A few years ago, during the several lockdown times of the pandemic, I took some online classes with Karlee Porter on Graffiti Quilting and Free-Motion Quilting; I wrote blog posts about my projects in those classes here and here.
The Panels
Shortly after taking those classes, I decided to make a couple of quilted blankets for one of my young nephews and one of my young nieces for their birthdays a few years ago. I found some lovely preprinted panels to use as the fronts and back of these quilts, all by Hoffman Fabrics. These panels are each roughly a yard (36 inches) square. I used a single layer of cotton-blend batting.
For my nephew’s blanket, I used 2 panels that had exactly the same symmetrical radiating patterns and colors for the front and back. I made sure to pin the layers of panels and batting carefully so that the centers and corners matched up.
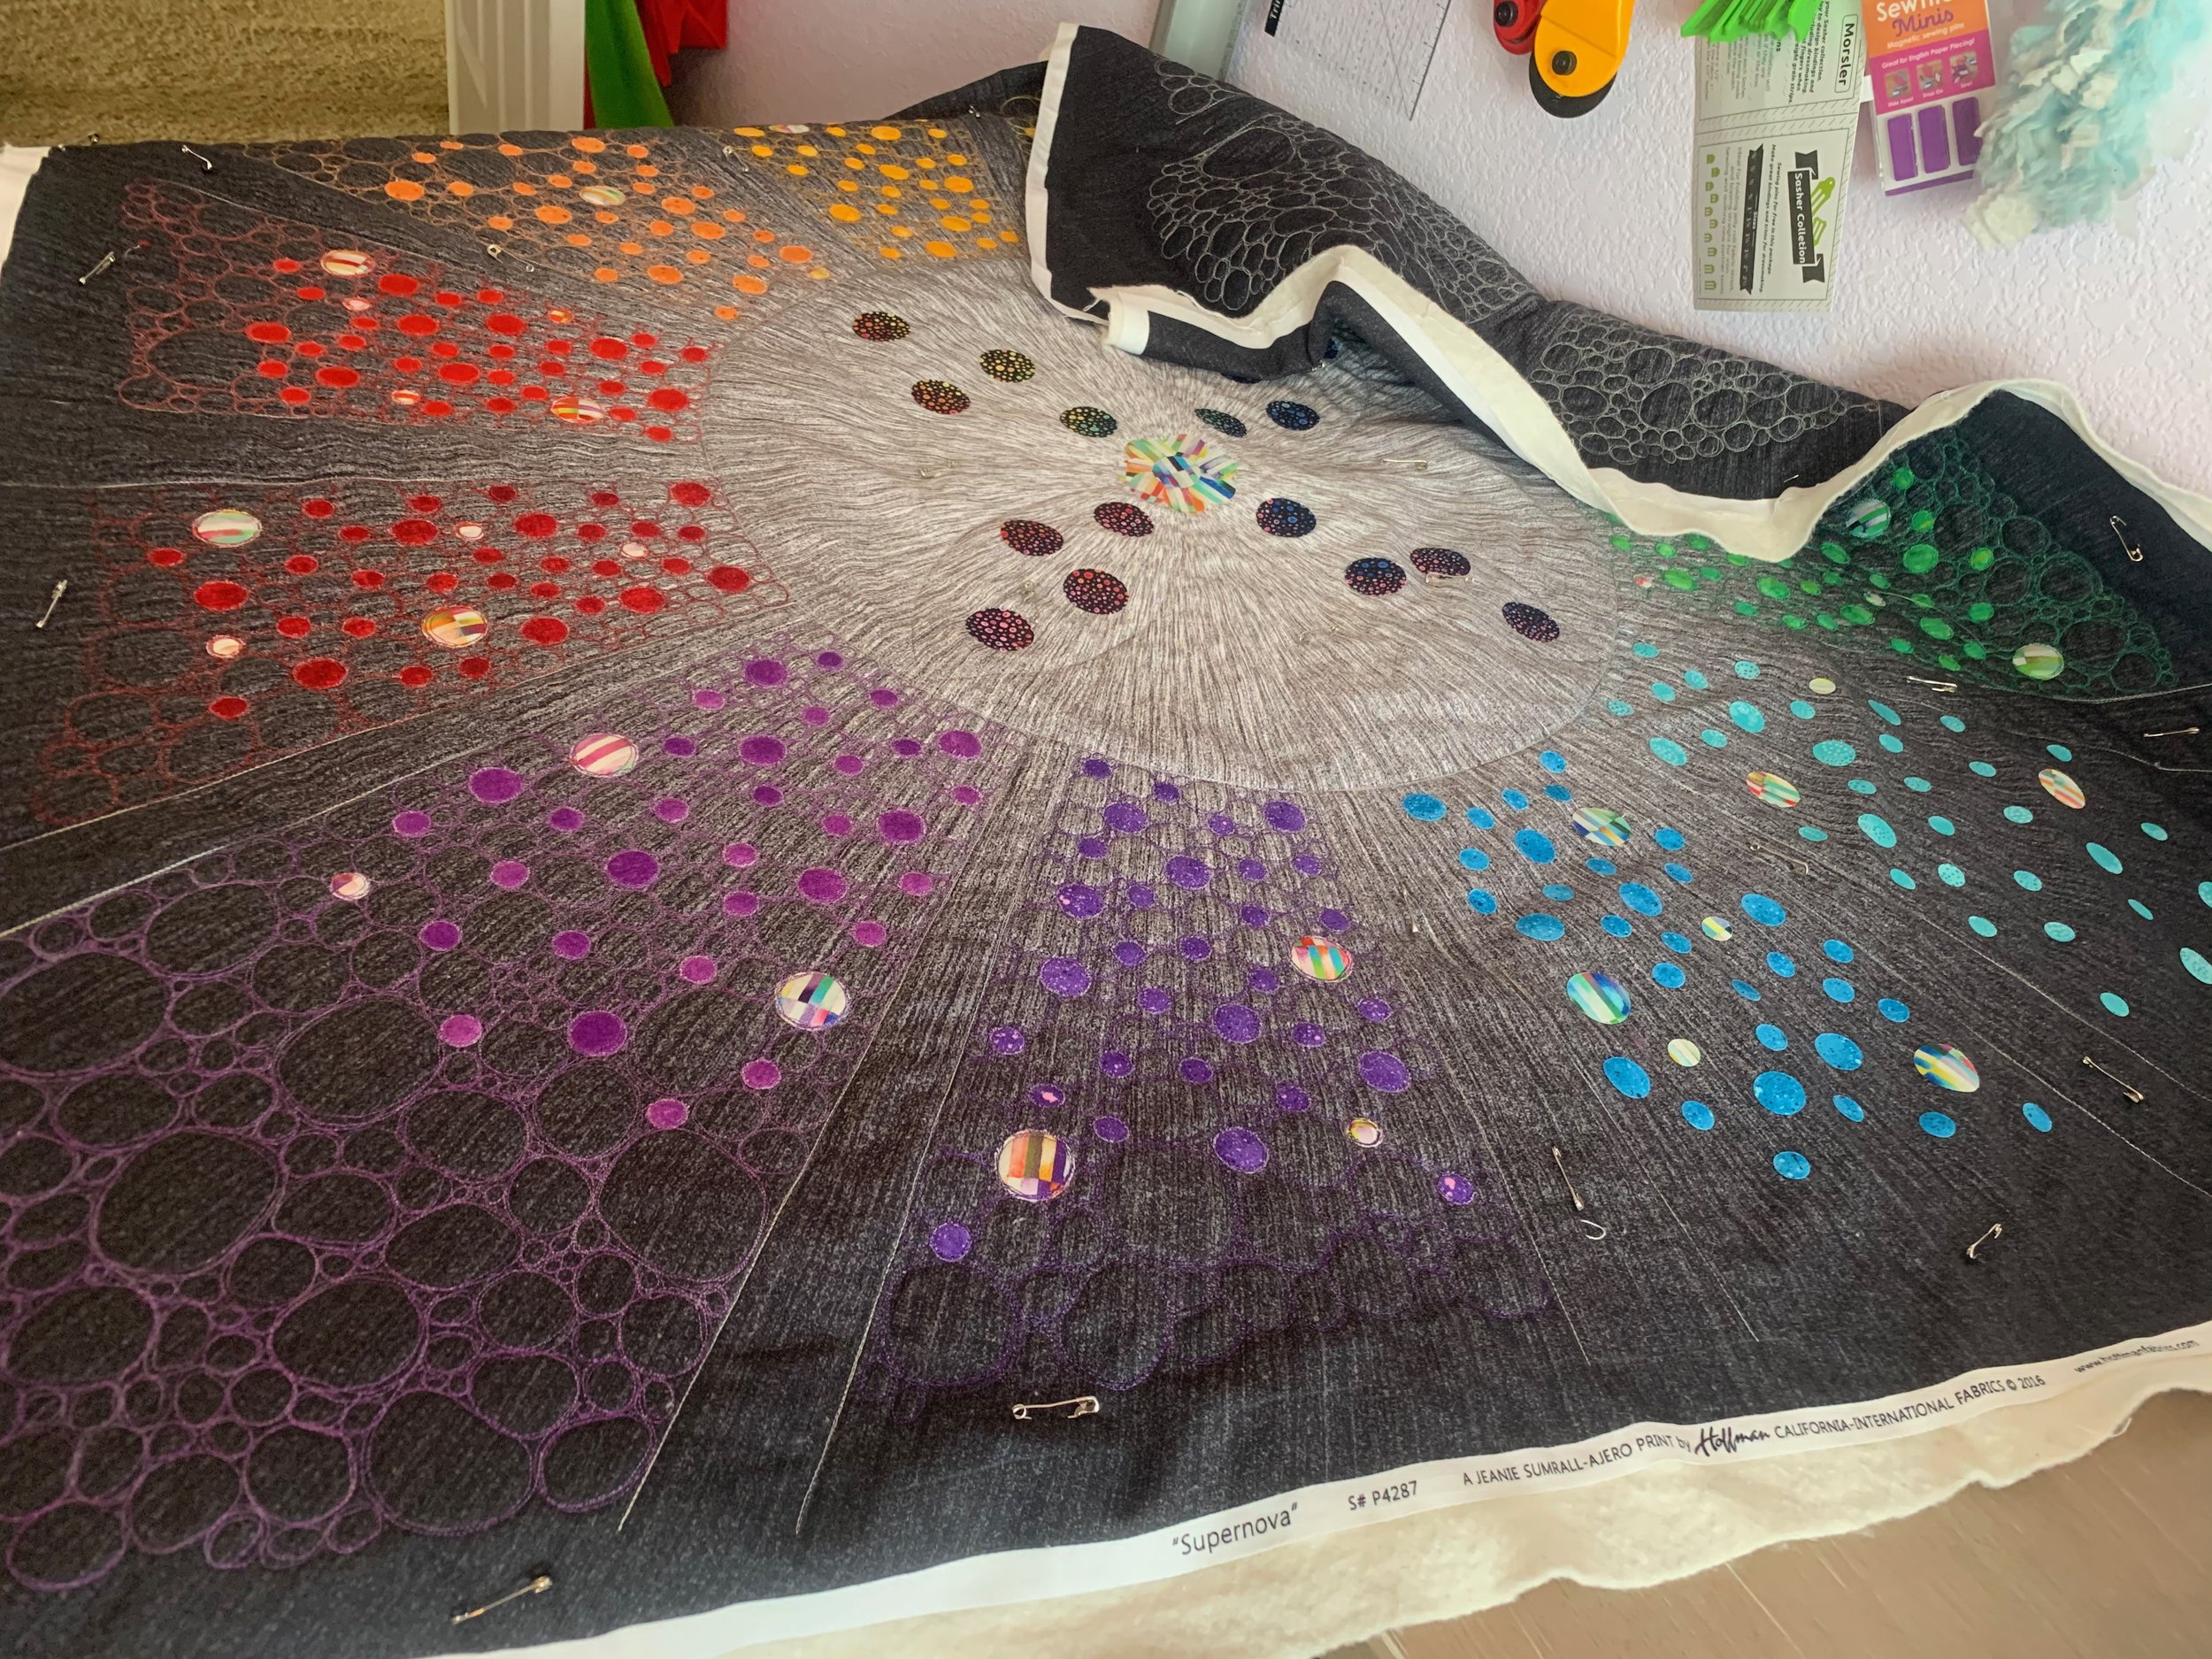
Front and back panels are the same - pinned to match up centers and corners
For my niece’s blanket, I found a very pretty flower panel for the front, and a rainbow-palette ombré for the back. Because I wanted to quilt the flower petals in a way that outlined their design, I needed a back that could take the quilting design without trying to match up another print on the backside, which wouldn’t have worked with the same flower panel since it was an organic design and not symmetrical nor a perfect reverse.

Front panel has a beautiful pre-printed design of a flower - this style of quilt-making is using a whole cloth quilt, rather than using a pieced front
Some Appliqué
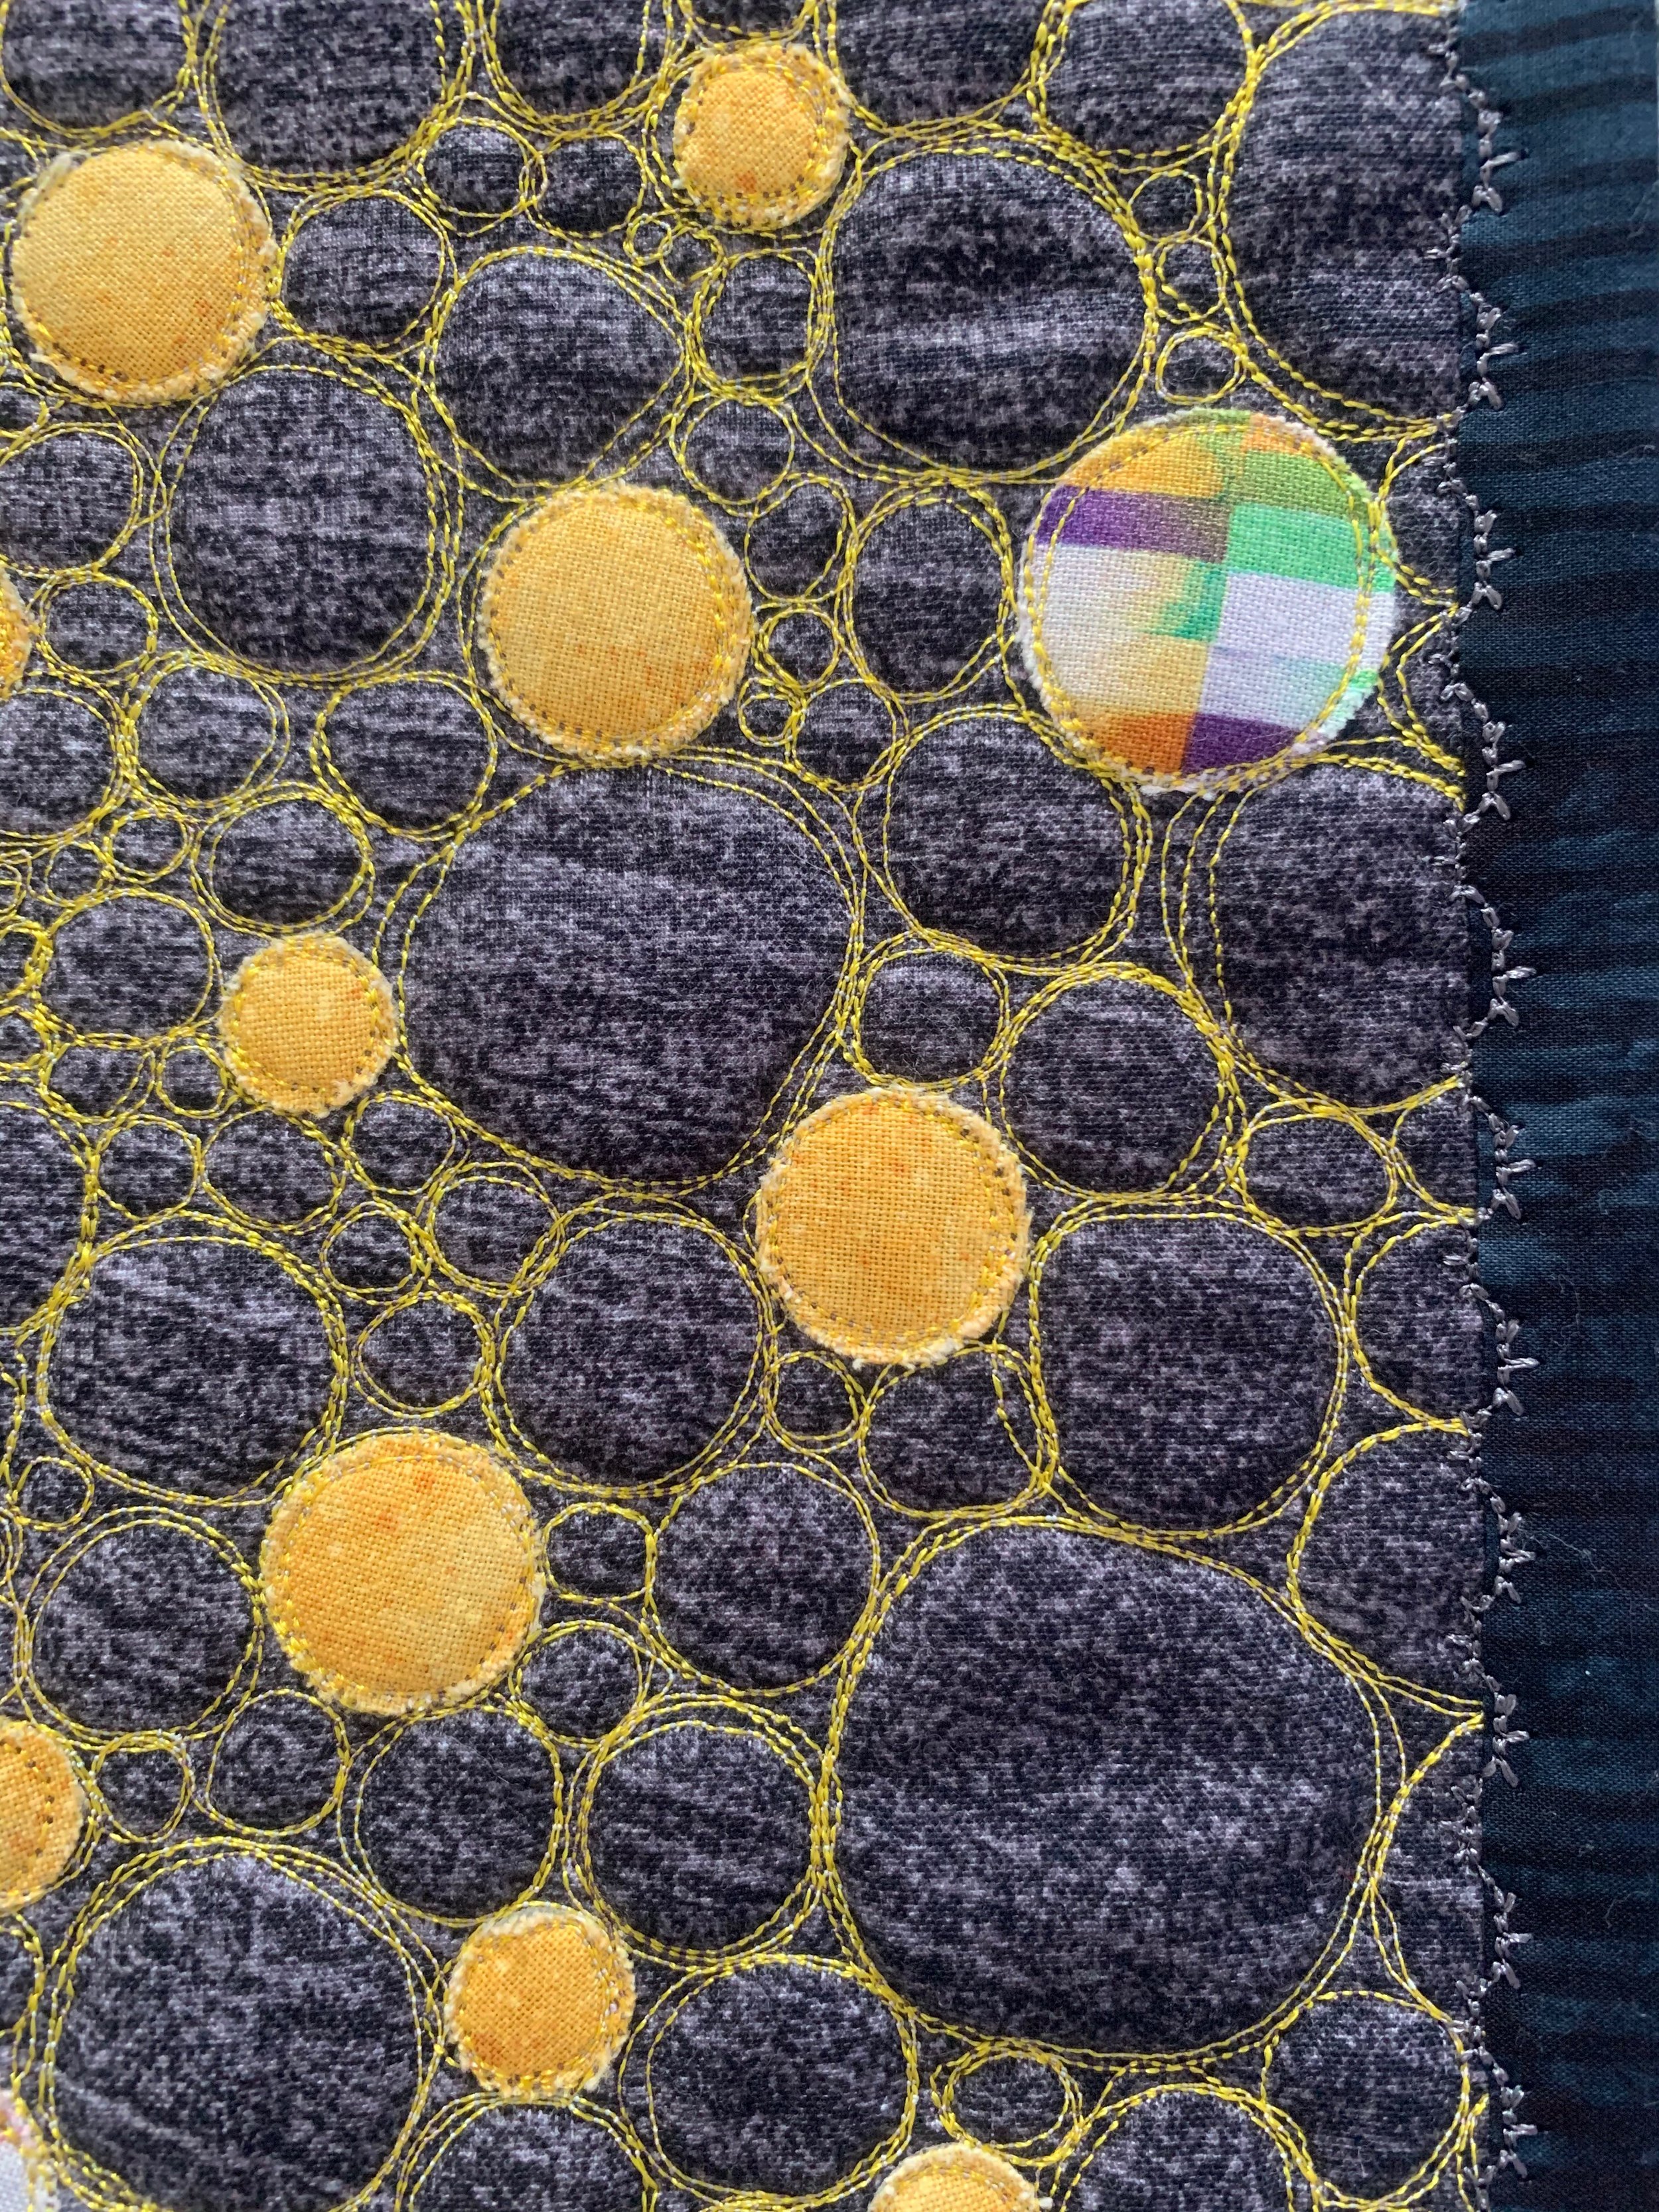
I made my nephew’s blanket first, since his birthday came first. For the front, I made little circle appliqués using scraps of fabric I had from previous projects, and I used an Accuquilt die for small circles in an Accuquilt Go! Cutter to cut them perfectly. I used a raw edge technique, with a very lightweight iron-on fusible product for appliqué to hold the circles in place for stitching. I fused first and cut the appliqués second.
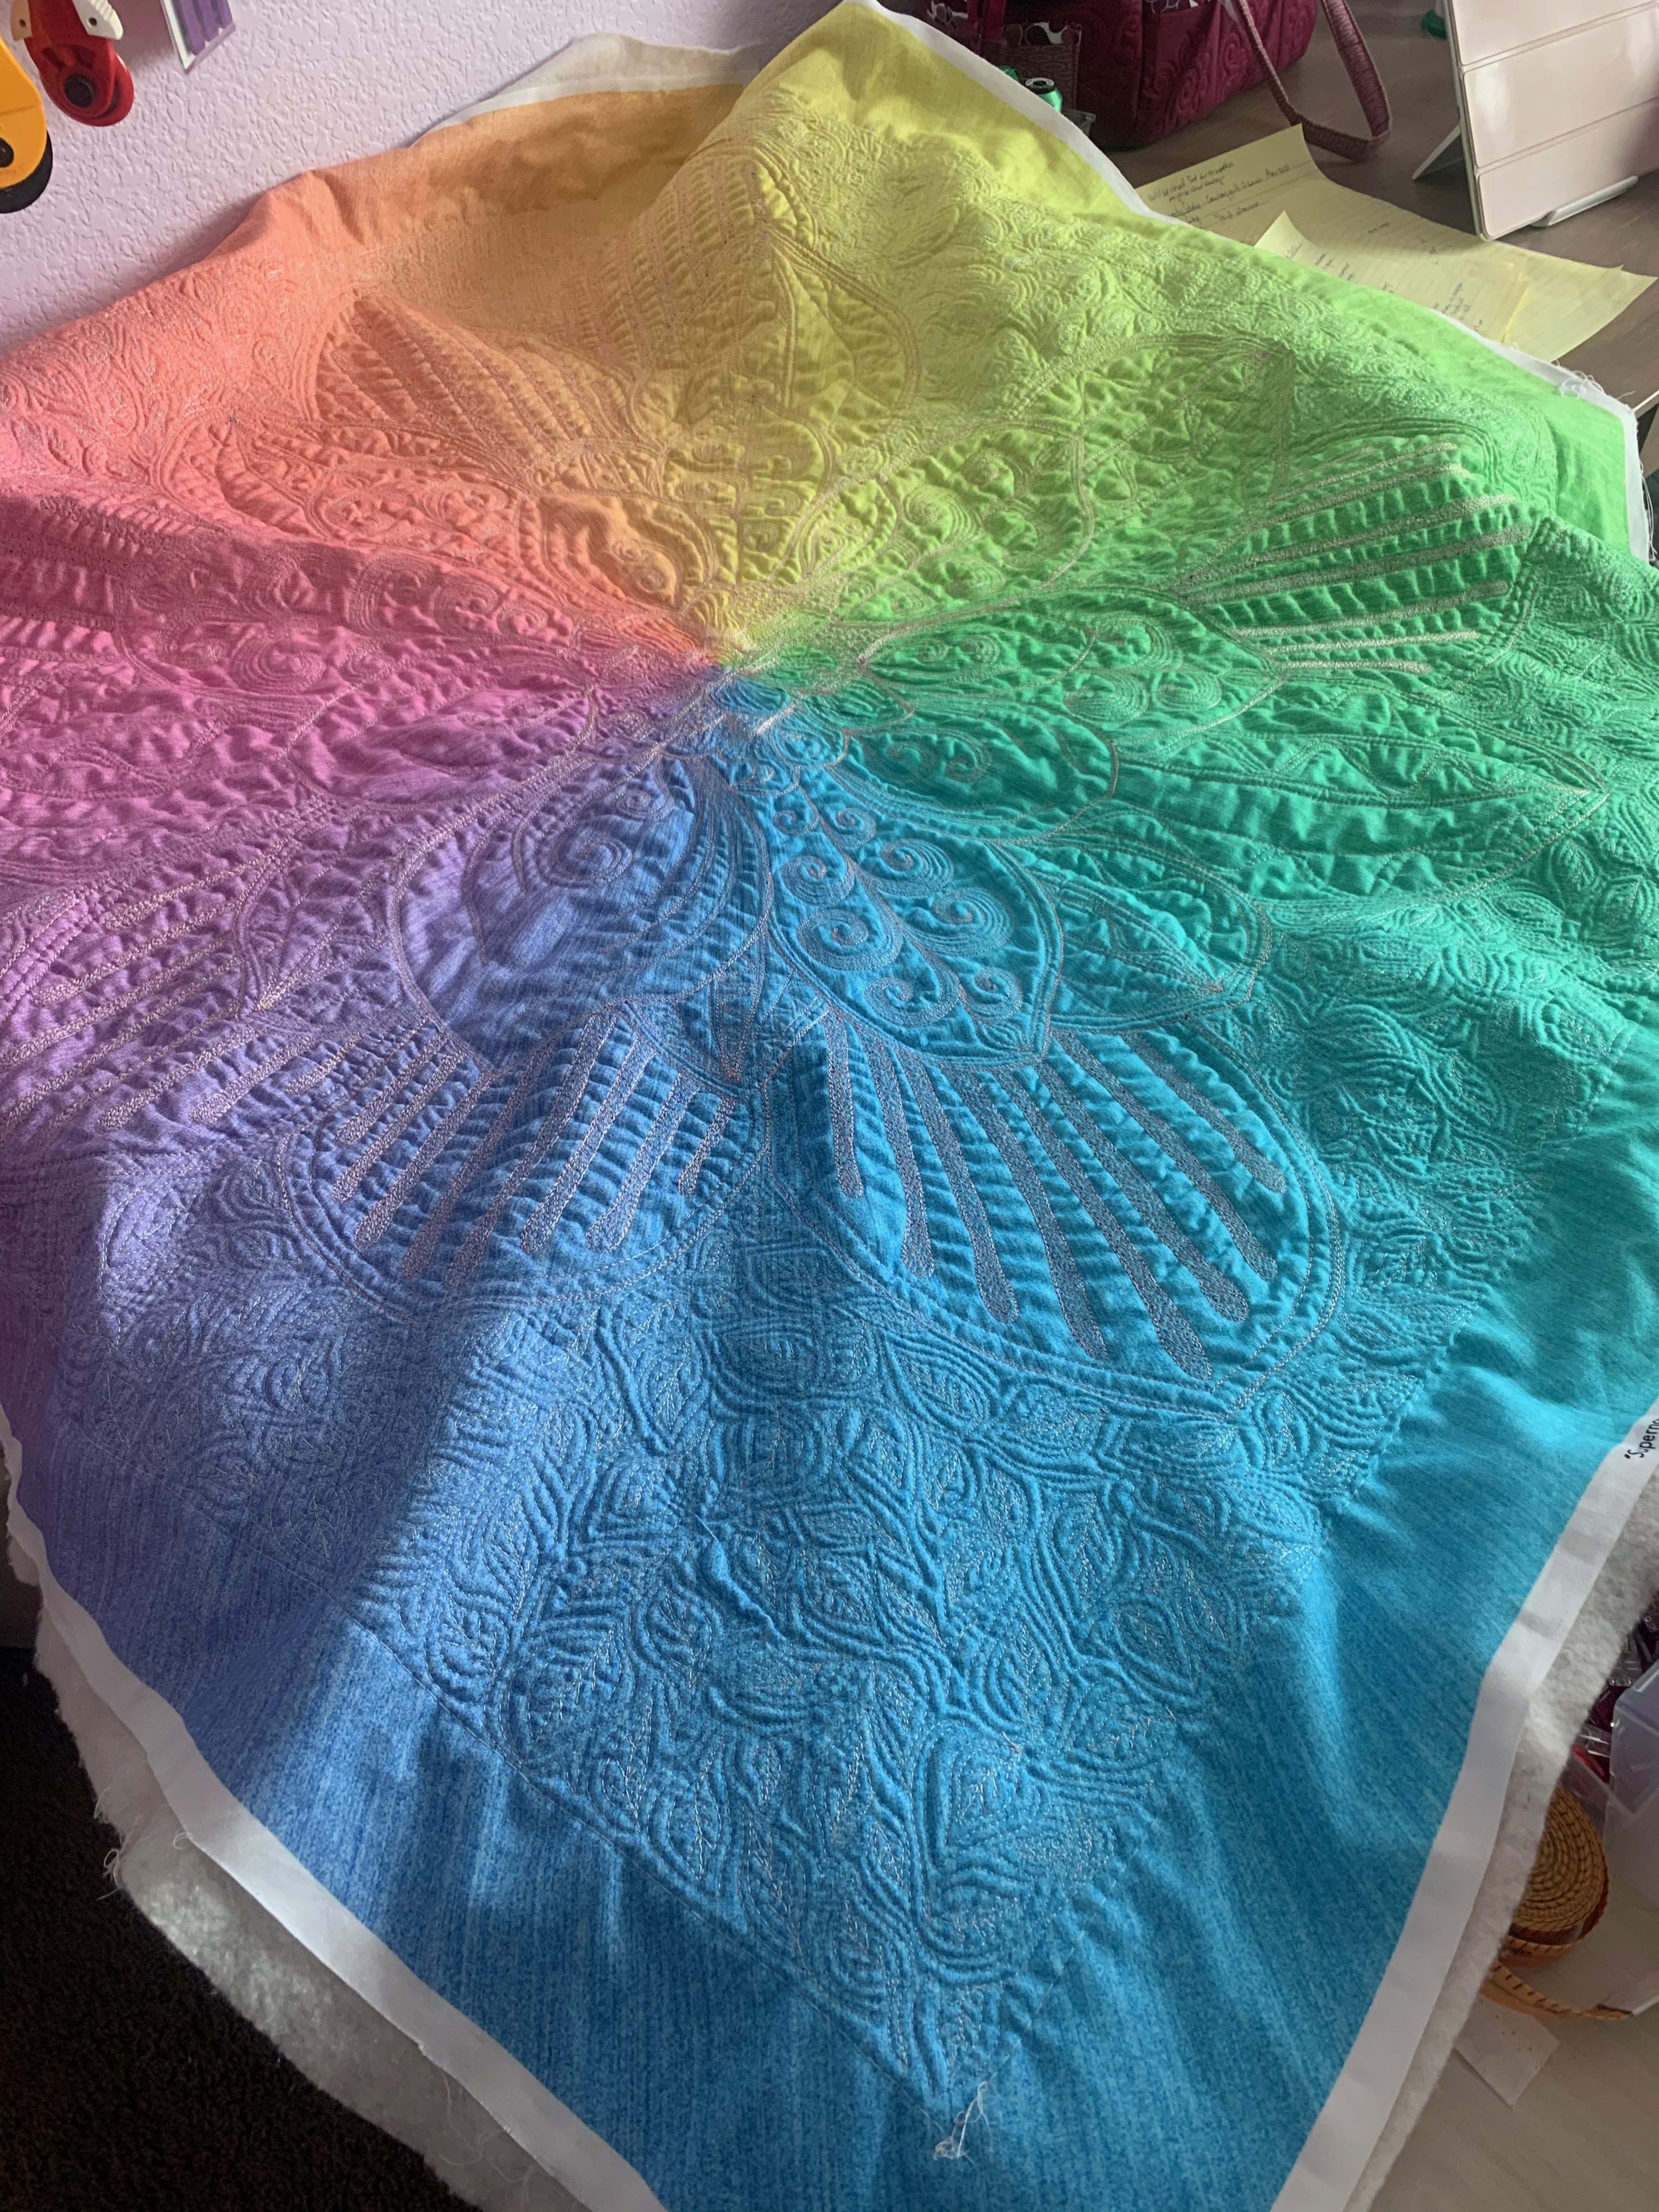
The overall motif I had in mind was something kind of sun-like for the design, and thinking of how sunlight has all the colors, I decided to go with a rainbow color theme rather than just yellows or oranges. Using free motion quilting, I first made a center medallion of a 4-petaled flower-like shape pointing into each corner, with some basic line fills, and that’s where I used some of the fabric that had rainbow prints. I used the color blender print fabric for the circles in the radiating spokes, each spoke having a different color of the rainbow in it, along with a few rainbow-print circles throughout.
The Thread and Quilting
For the entire project, I used 40wt polyester Isacord embroidery thread. I know many free-motion quilters like to use a clear or smoky monofilament thread, but I really like seeing beautiful thread in a quilting design.
For my nephew’s blanket, I chose different threads for the top thread and the bobbin thread - I chose top thread that matched the color of each fabric in each of the radiating spokes on the front of the blanket. For the bobbin thread (on the back of the quilt) I used a variegated thread in tones of light grays and dark grays. I made radiating spokes to divide up the design, and I used a pebble quilting design to both appliqué down the fabric circles and also to fill in the rest of the space.
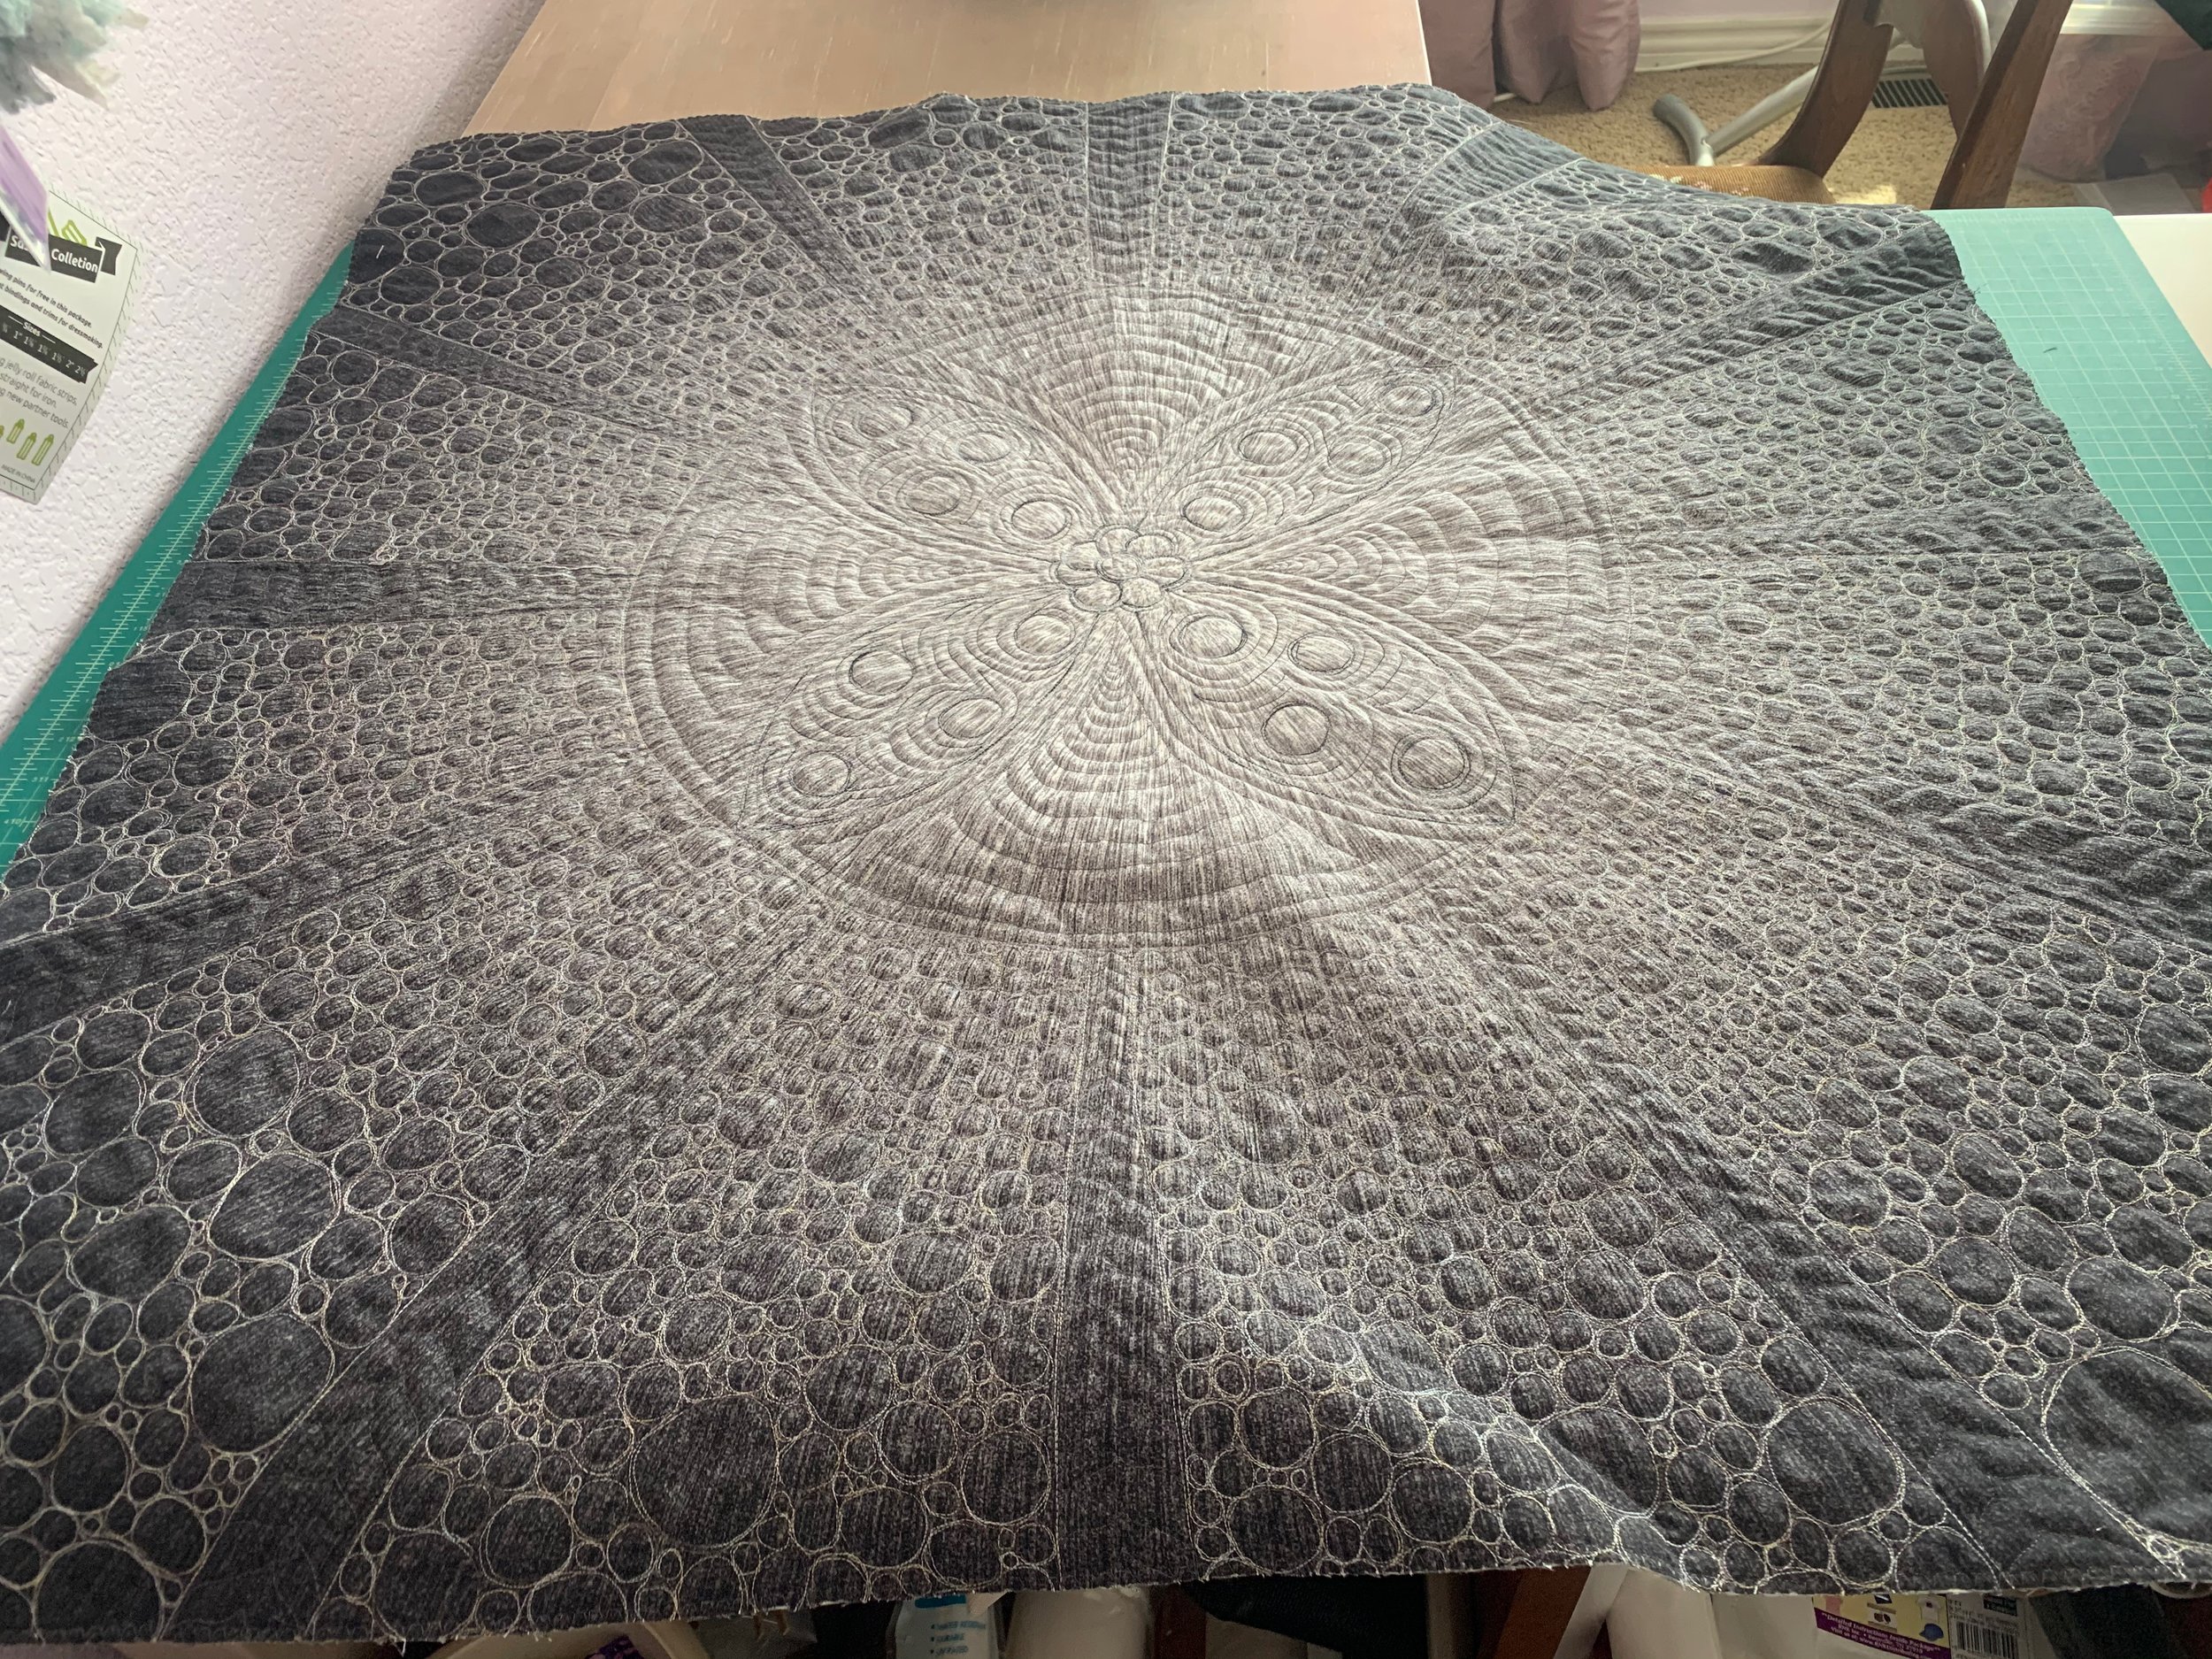
The neutral-toned variegated thread on the back of my nephew’s blanket gives a different look than the bright colors I used on the front
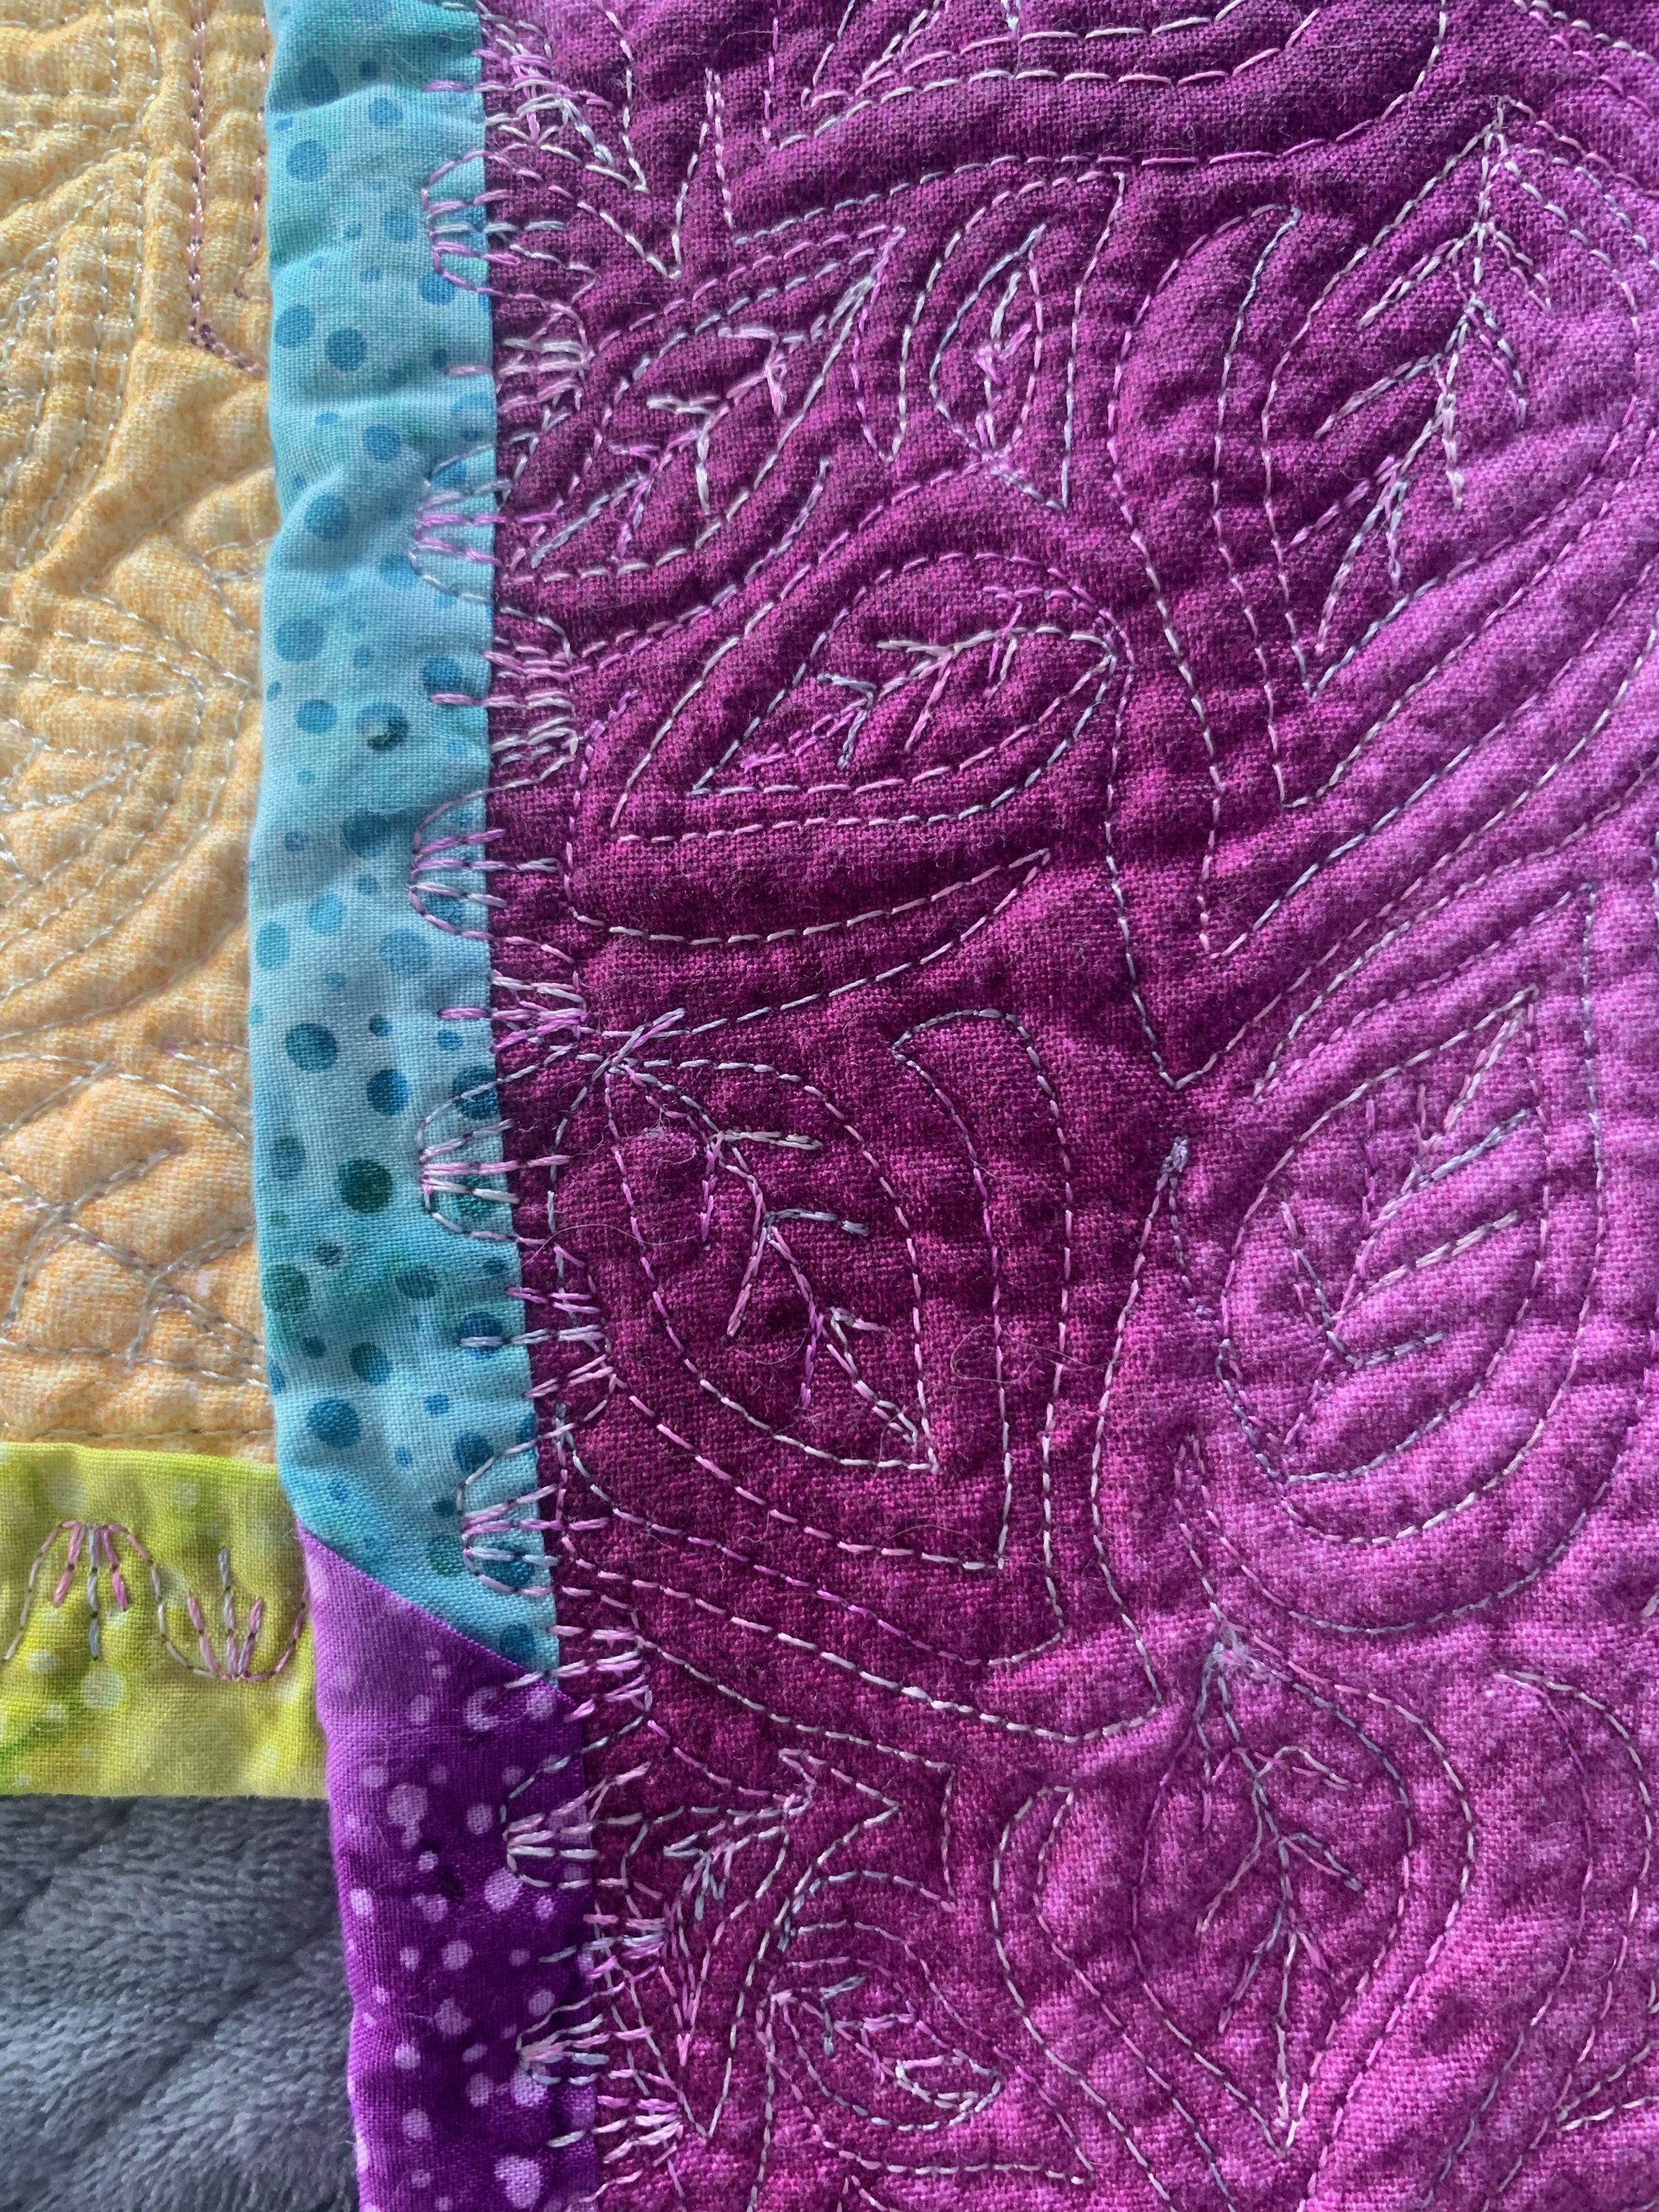
For my niece’s blanket, I didn’t use any appliqué as the print itself was the design I wanted to highlight. I roughly grouped the different rows of petals into different free-motion fills, and decided not to try to follow the petals that fell off the edge. Instead, I made a wandering leaf fill for the space between the last complete petals and the edge of the blanket. For the thread colors, I chose a yellowy-coral color for the center, an array of beautiful deep pinky-reds for the flower petals, and a variegated pink and green thread for the leaf fill. I worked from the center outwards. For the bobbin thread on the back, I chose a light peachy color that I felt harmonized well with all the pastel rainbow colors of the back panel.
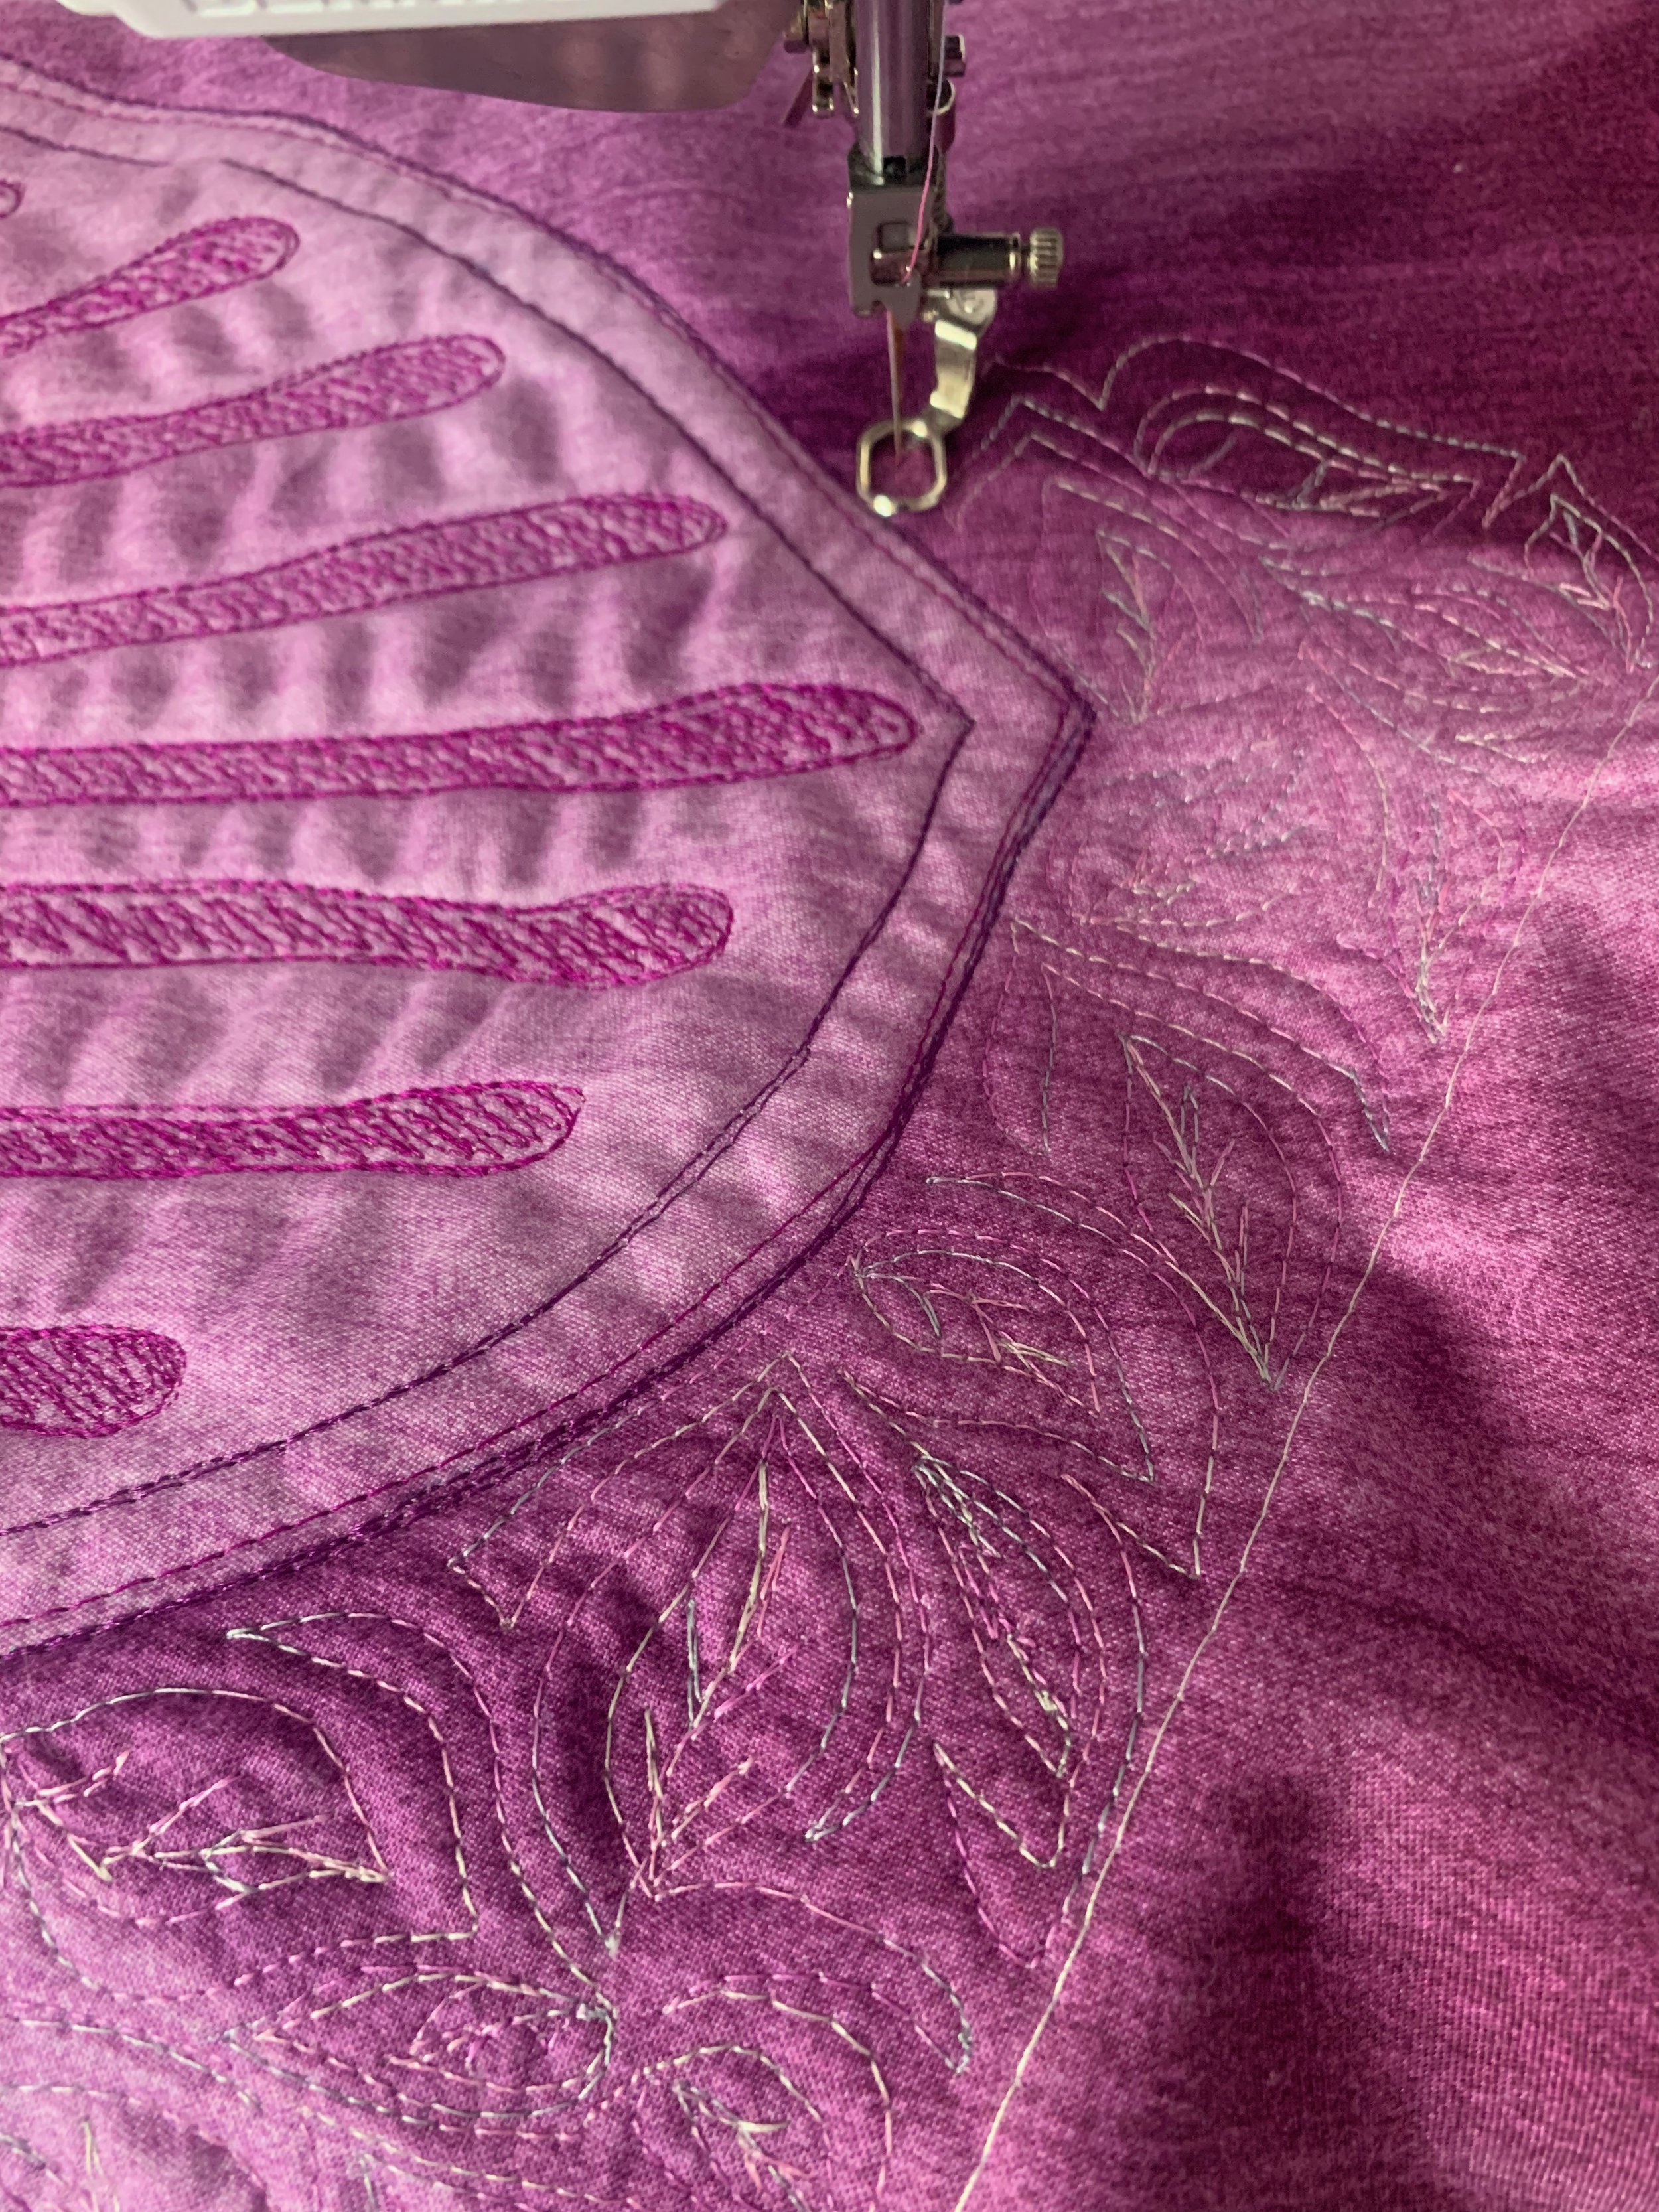
Close view of the threads and fills patterns on my niece’s quilt
View of the peachy color thread on the rainbow ombré back of my niece’s blanket
The Binding
Finally, for the binding, I used some blender fabric from precut jellyrolls, which are 2.5 inch wide strips of fabric from a collection, usually with about two of each fabric, cut width of fabric and then wrapped into a little roll. I stitched the binding on each quilt with a decorative stitch that would go with the overall quilt fill themes and also minimize any unevenness in the way I folded my binding around the edges. I attached the binding by machine from the back and wrapped it to the front, where I machine stitched it.
Close-up view of the binding stitch on my nephew’s blanket plus an example one of the front thread colors
Close-up view of the binding stitch I used on my niece’s blanket
Finished
At the beginning of this post you can see the finished and bound fronts of both mini quilts. Here are the bound and finished backs - with the quilt labels blanked out for the privacy of my young niblings:
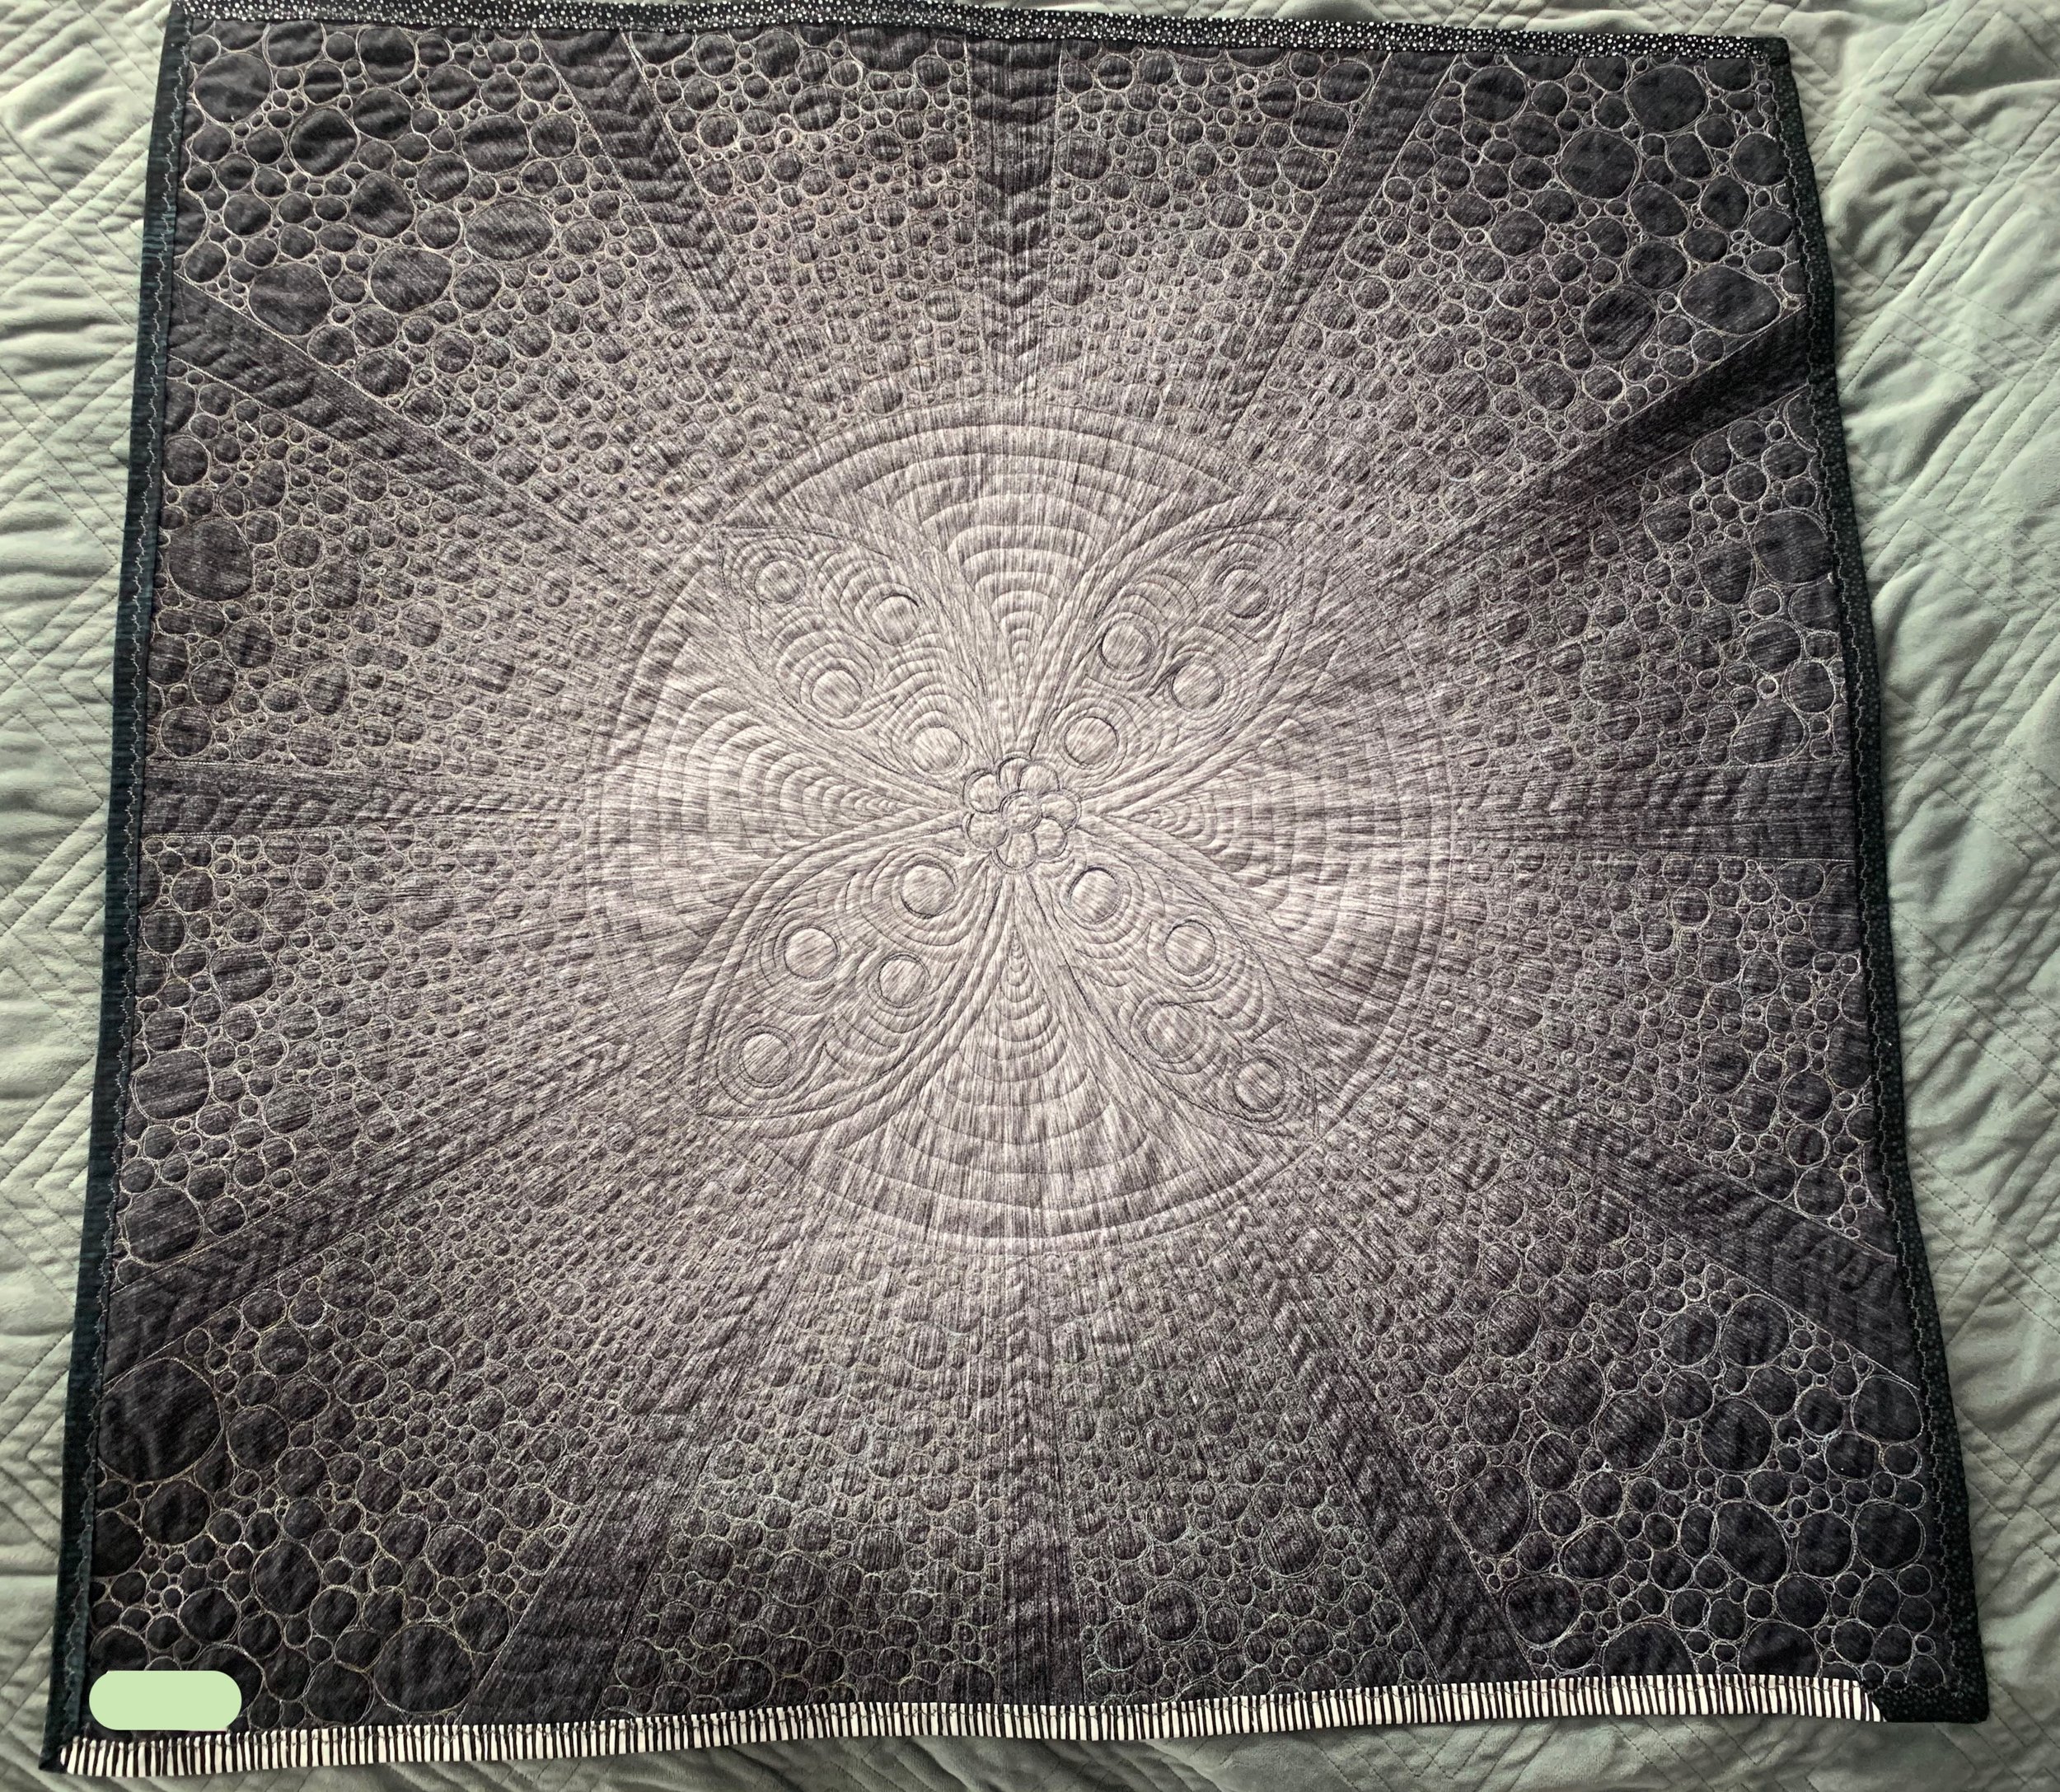
Finished and bound back of my nephew’s blanket
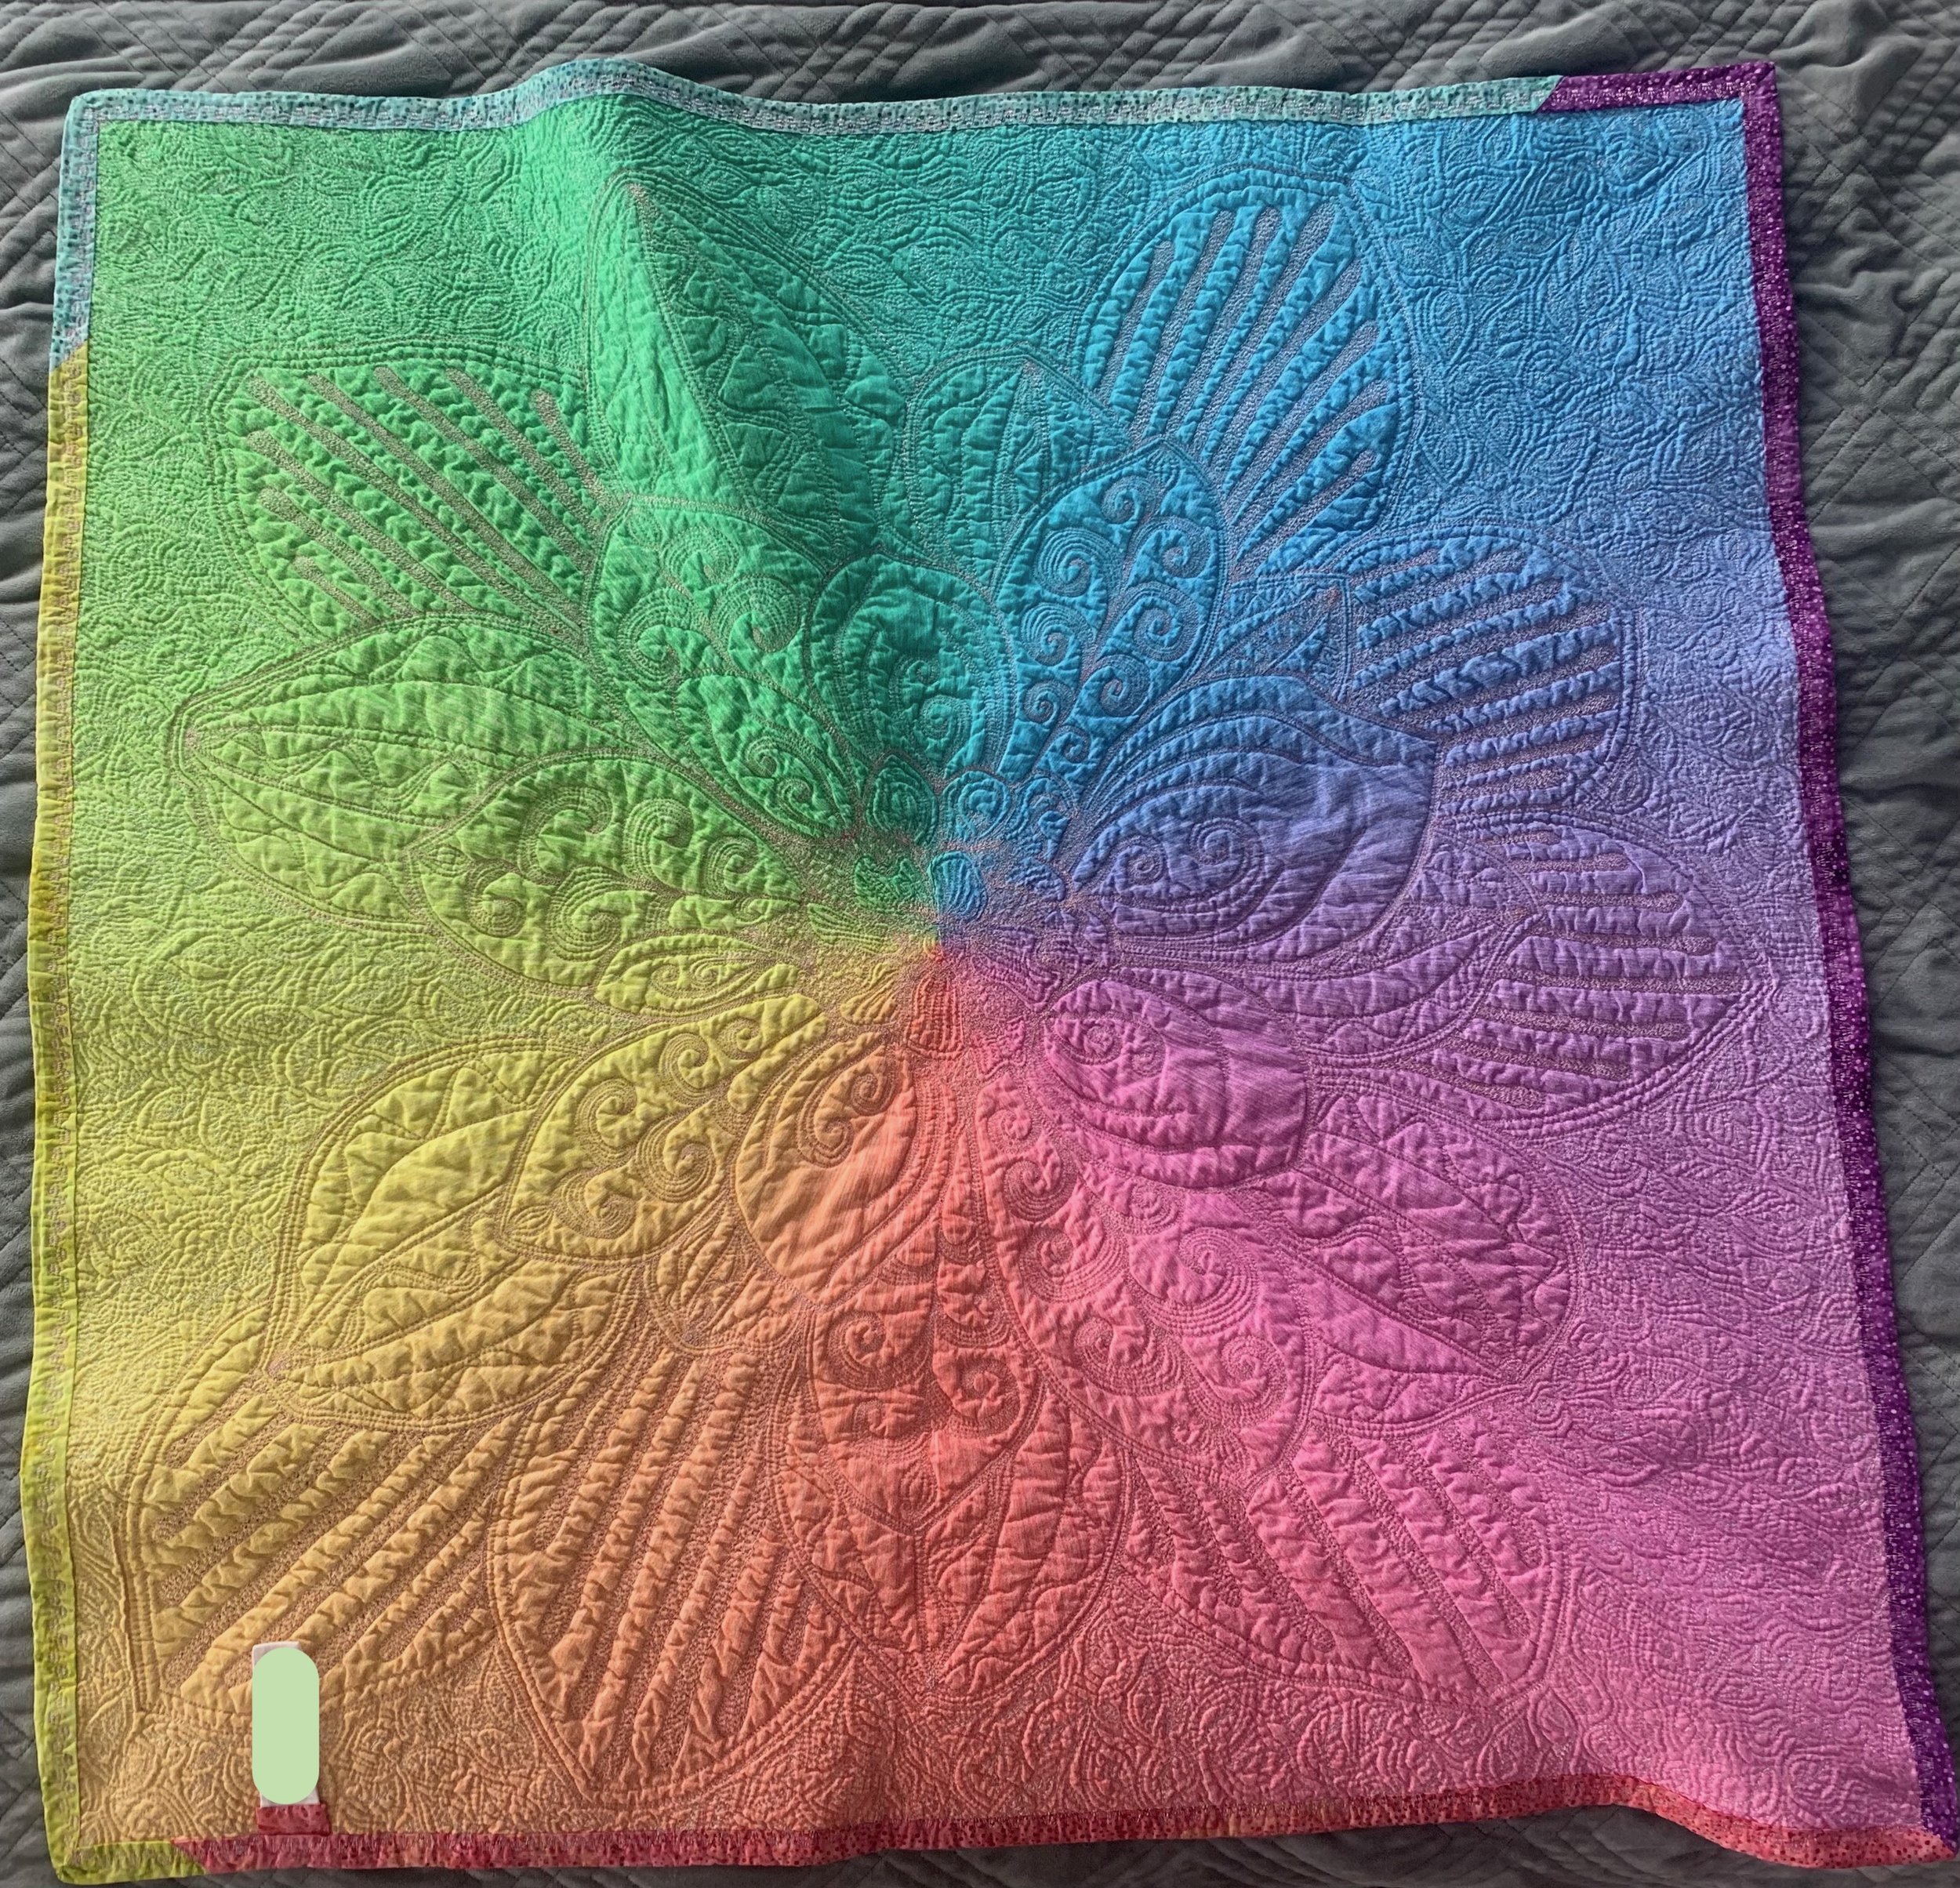
Finished and bound back of my niece’s blanket
Epilogue
Each project took me roughly a month to complete. I really enjoyed making these projects, and I especially delighted in giving them to my nephew and niece. I’ve made a number of sewn gifts for all of my assorted nieces and nephews over the years, and I would probably make all their gifts from me all the time (with the exception of books) if I had the time to do so!
Also, a note on these panels - these particular ones are discontinued by now, but there are a lot of great panels out there that work well for whole cloth quilts, or for cutting and sewing like traditional quilt piecing. Using a panel or interesting large print yardage for a whole cloth quilt is a great way to try out quilting if you are intimidated by the thought of piecing a quilt, or maybe you just don’t enjoy the piecing process. Using a panel is also a quicker way to make a quilt or blanket if you are an experienced quilter just looking to make a faster project for a sudden occasion. For gifting to young children, especially, I think a whole cloth quilt can be a durable choice, if the parents are worried about potential damage to a beautifully pieced heirloom.