Crossroads Sampler Quilt Class

My finished quilt top!
During the continuing Great Pandemic in 2021 I took two big online classes - Free Motion Frenzy 2021 with Karlee Porter, and the Crossroads Sampler pieced quilt Block of the Month Class. This post covers the Crossroads Sampler, Designed by Scott Flanagan of 4th & Main Designs, taught online through The Presser Foot in Longmont, Colorado.
Sampler
As the name says, this quilt is a sampler - in this case there were 12 different “blocks” or rows, one for each month of the year, with the designs being repeated to create 4 rows, and 2-4 of each of the other blocks with the exception of the center block of which there is just one. I appreciated that the quilt started with the simplest of piecing designs and worked its way through more complicated blocks, and ended with a large paper-pieced block for the last month.
Choosing Fabric Colors
The Crossroads Sampler pattern had several suggested colorways to use for buying your fabric. There were 6 colors plus a background color for the blocks, and then a setting color for the final framing of the whole design. I chose the one that was shown in a rust-and-blue colorway, and adjusted the blues more into the turquoise and green family. I had a digitial version of the instructions and brought up the fabric selection page in my ProCreate drawing app so I could play with colors. I basically just drew different colors over the different block pieces until I found what I liked. Then I printed up the page and while referring to the digital image, I used colored pencils to scribble in the colors I wanted next to the suggested colors for the pattern, which also gave the yardage needed for each color. I was able to walk around the fabric store and use my color pencil marks as a guide to choose fabrics from around the store.
I was pleased with my color choices, but I ended up with a mix of batiks and regular quilting cottons - visually this was fine - but they behave differently when ironed and sewn, and this can really affect your carefully-cut triangles and squares and other precise shapes. The batiks are wonderful for rich, complex colors and they don’t really have a “right” or “wrong” side. They also don’t ravel very easily. However, I used Best Press sizing when I ironed my pieces, and the batiks shrunk a little! After a few frustrating examples of this, I ended up only ironing my cut pieces while they were dry, and then using the Best Press after I had the block completely sewn together. I had different fabric brands for my other colors, and again, they didn’t behave all the same when when sized and ironed - some shrank more on one direction of the weave than the others. When you are working with pieces that already are only a few inches big, and you need a fairly accurate 1/4 inch seam allowance, even a shrinkage of 1/8 inch can throw off your sewing and how you line up the edges of pieces to each other.
The Blocks
The Block of the Month format made it easier to keep up. It’s time-consuming to measure, cut, measure again, press, sew, etc! I took pictures as I went along, partly so we could share photos with each other for class, and also so I could remember my work! The first four months of the quilt had us practicing with some of the basic building blocks as single rows. These classic block pieces end up being combined together in different ways in later blocks.
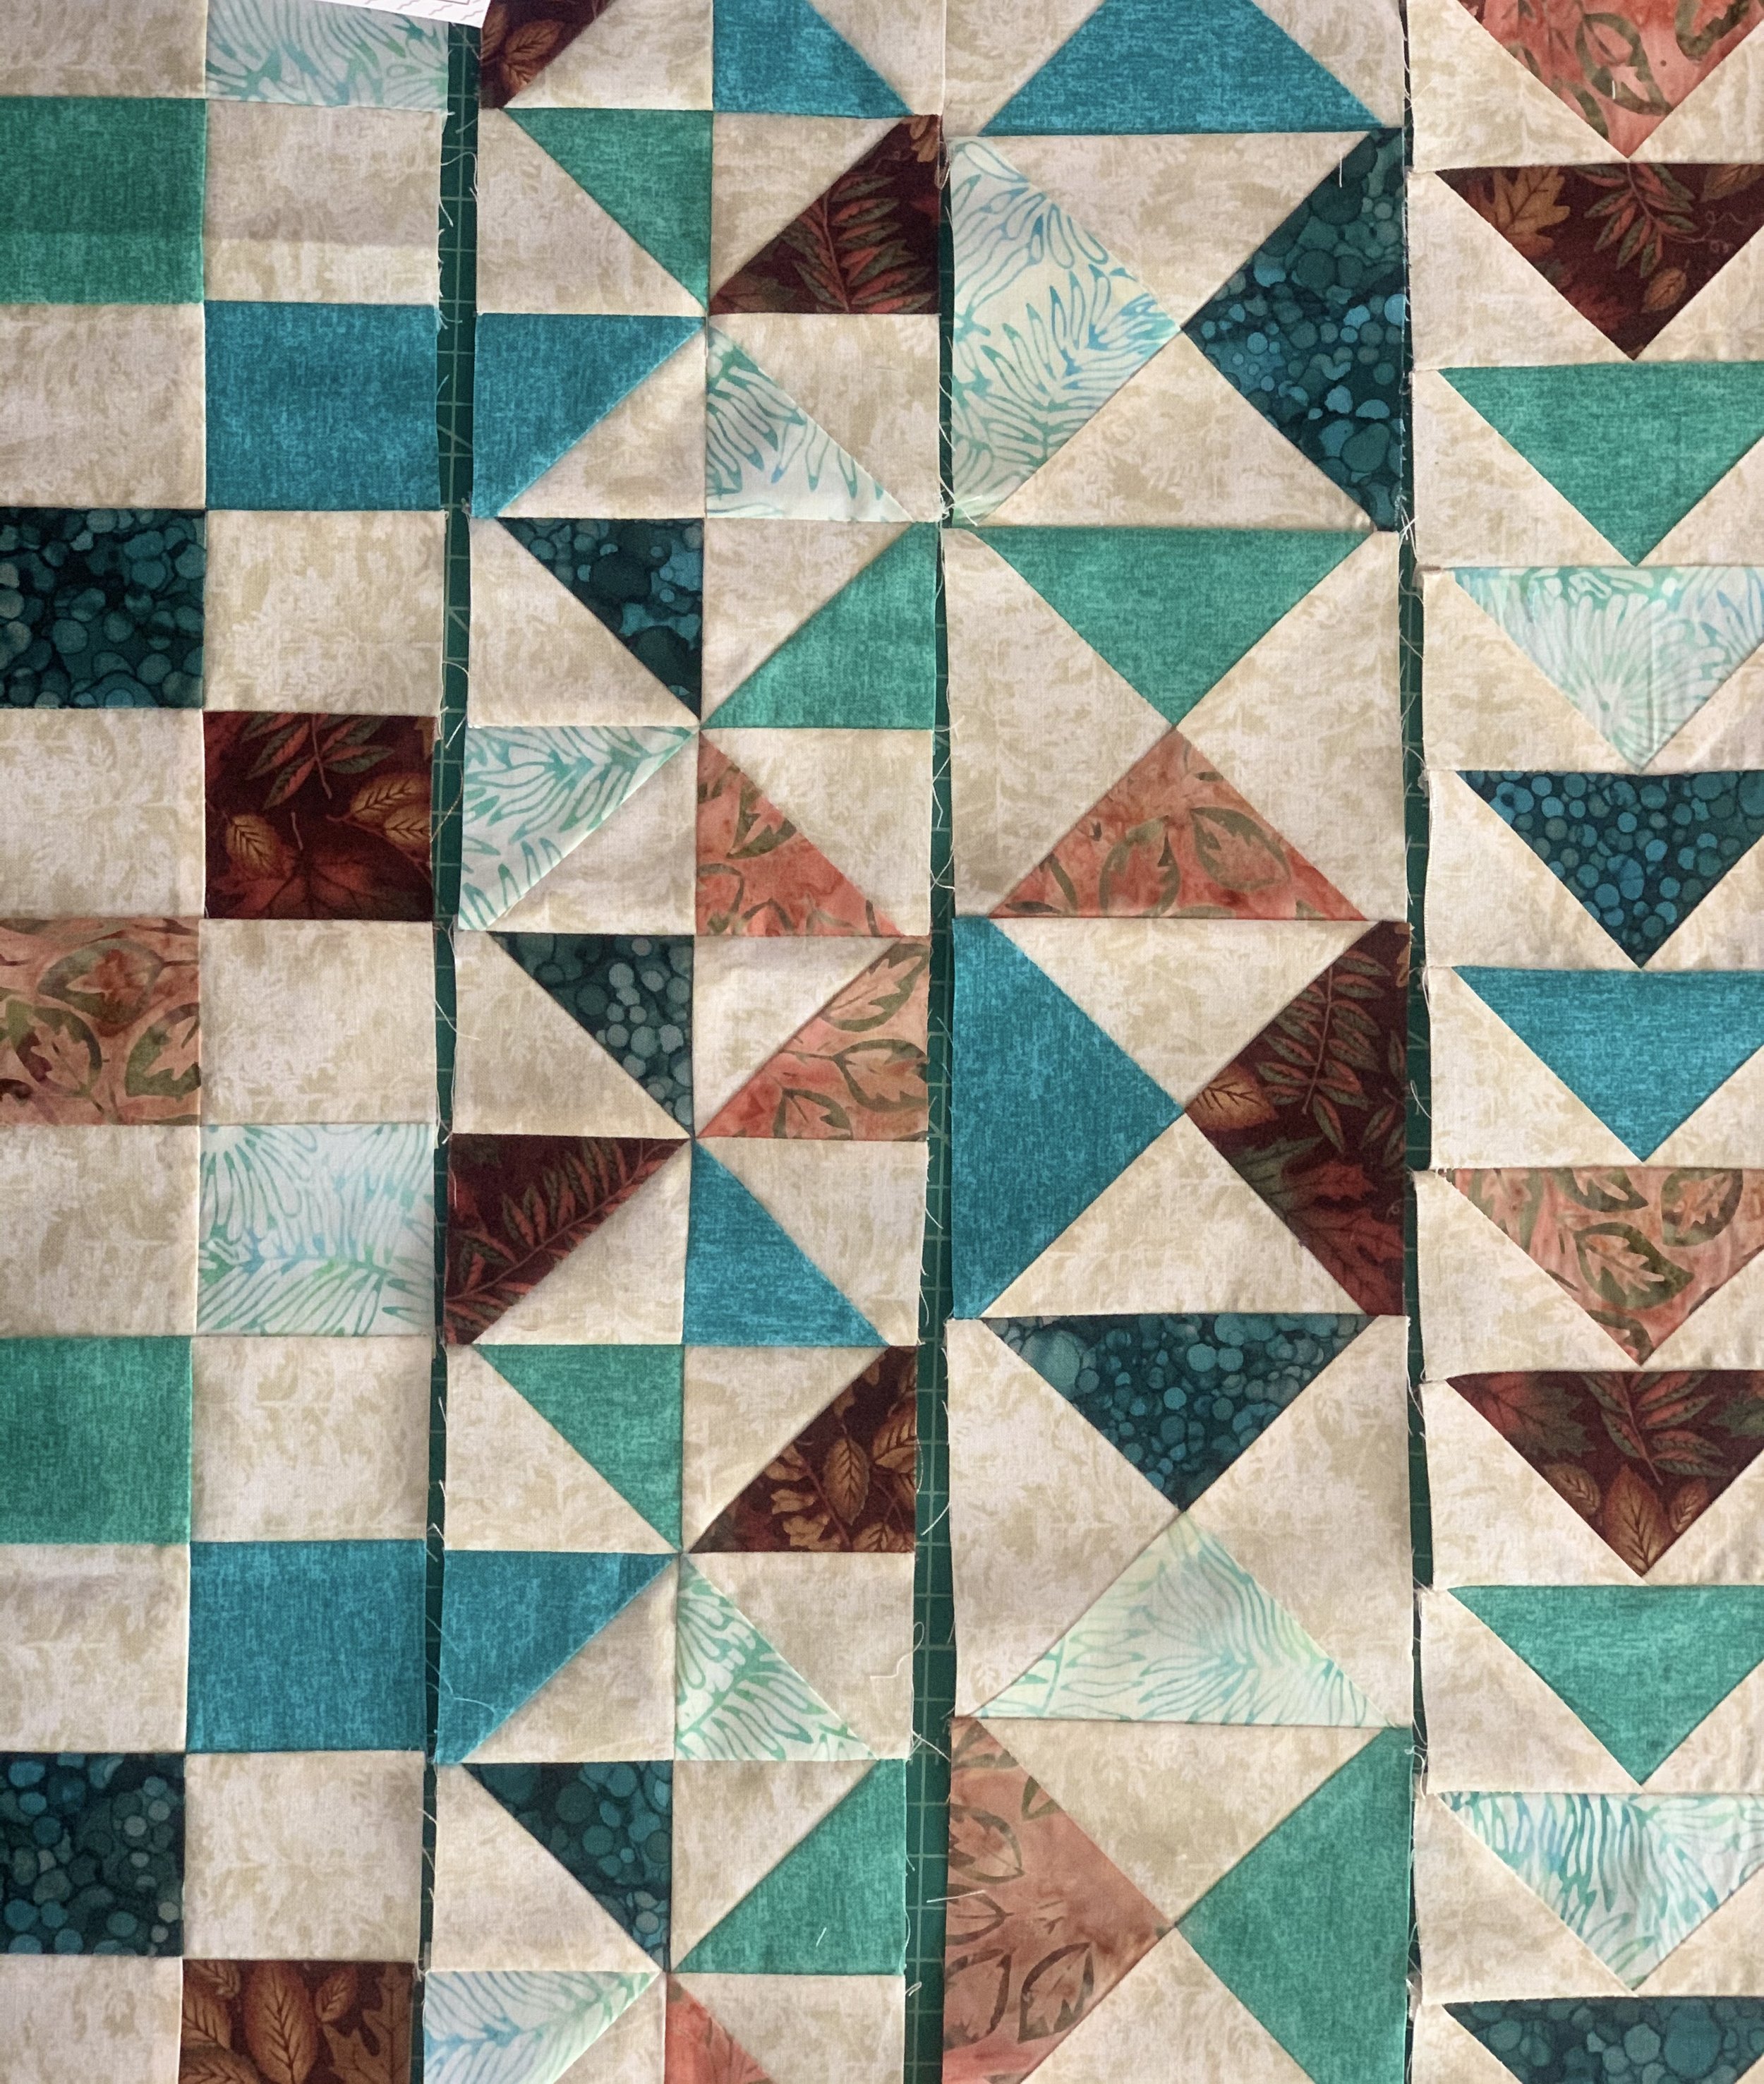
In order shown: Checkerboard, Pinwheels, hourglass, Flying Geese
The next 3 months started combining earlier shapes. For each of these smaller blocks, we made four. The blocks then got framing on different sides using the background color.
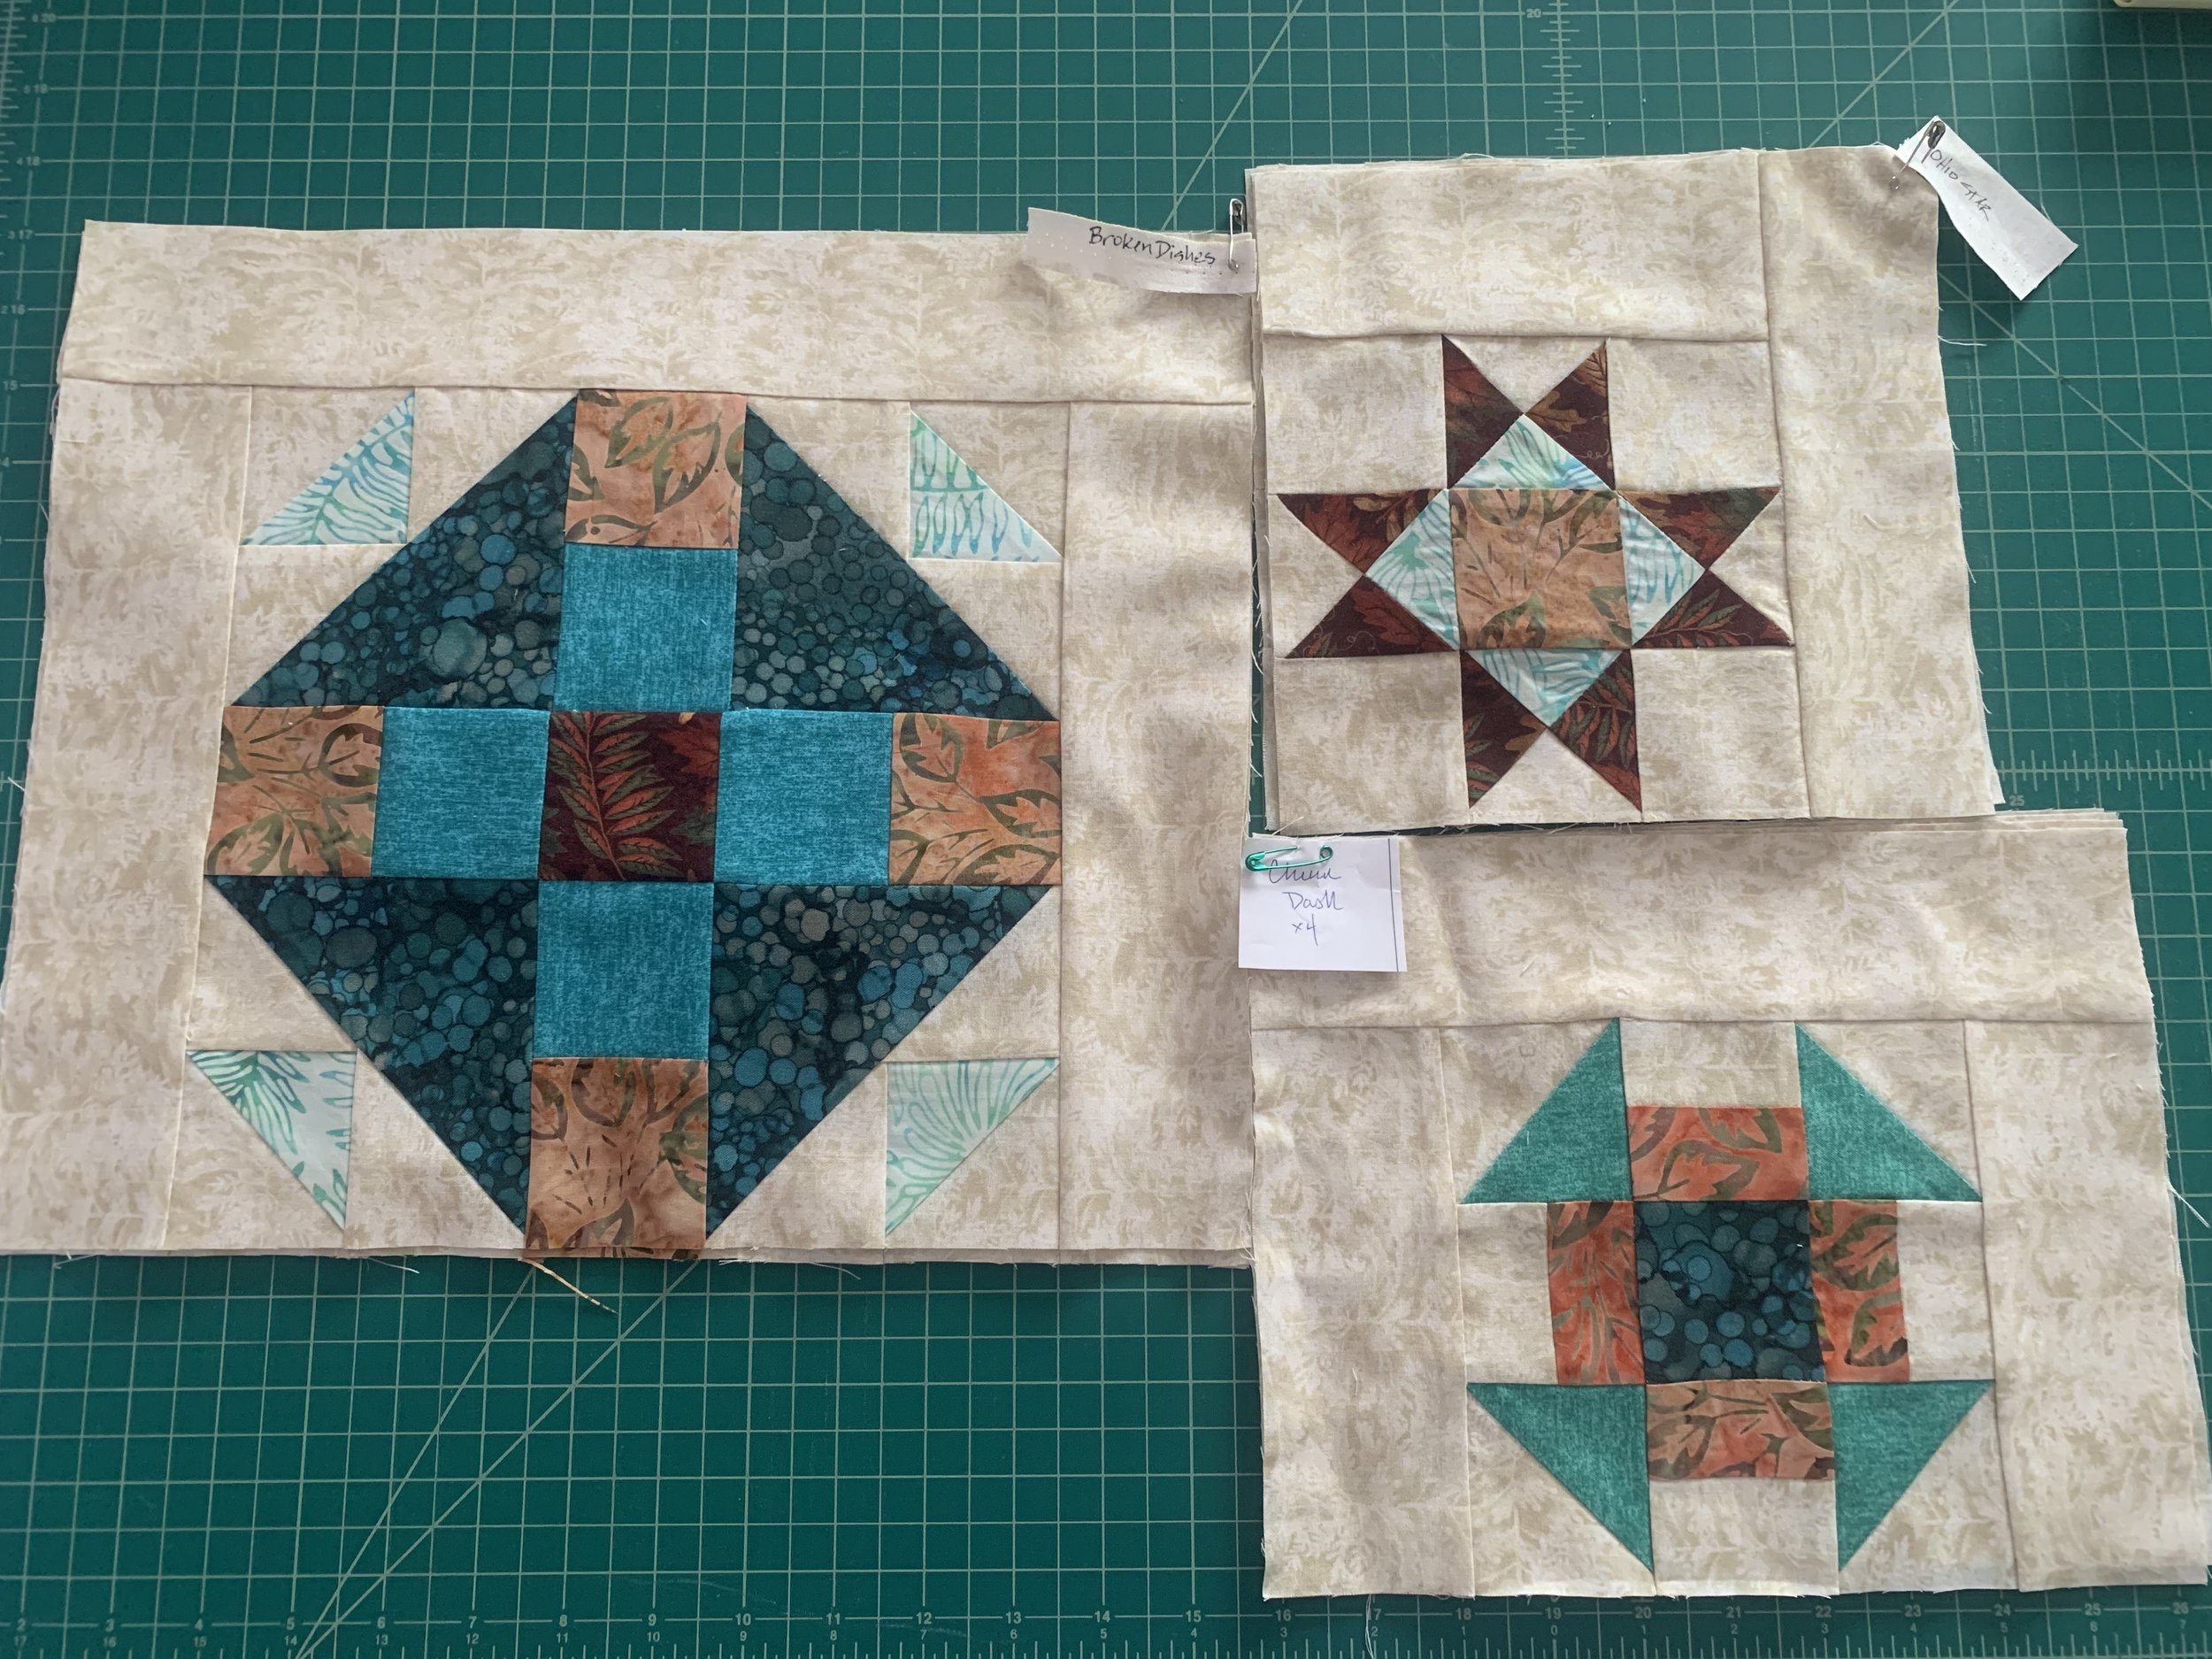
The blocks in order: Broken Dishes, Ohio Star, Churn Dash
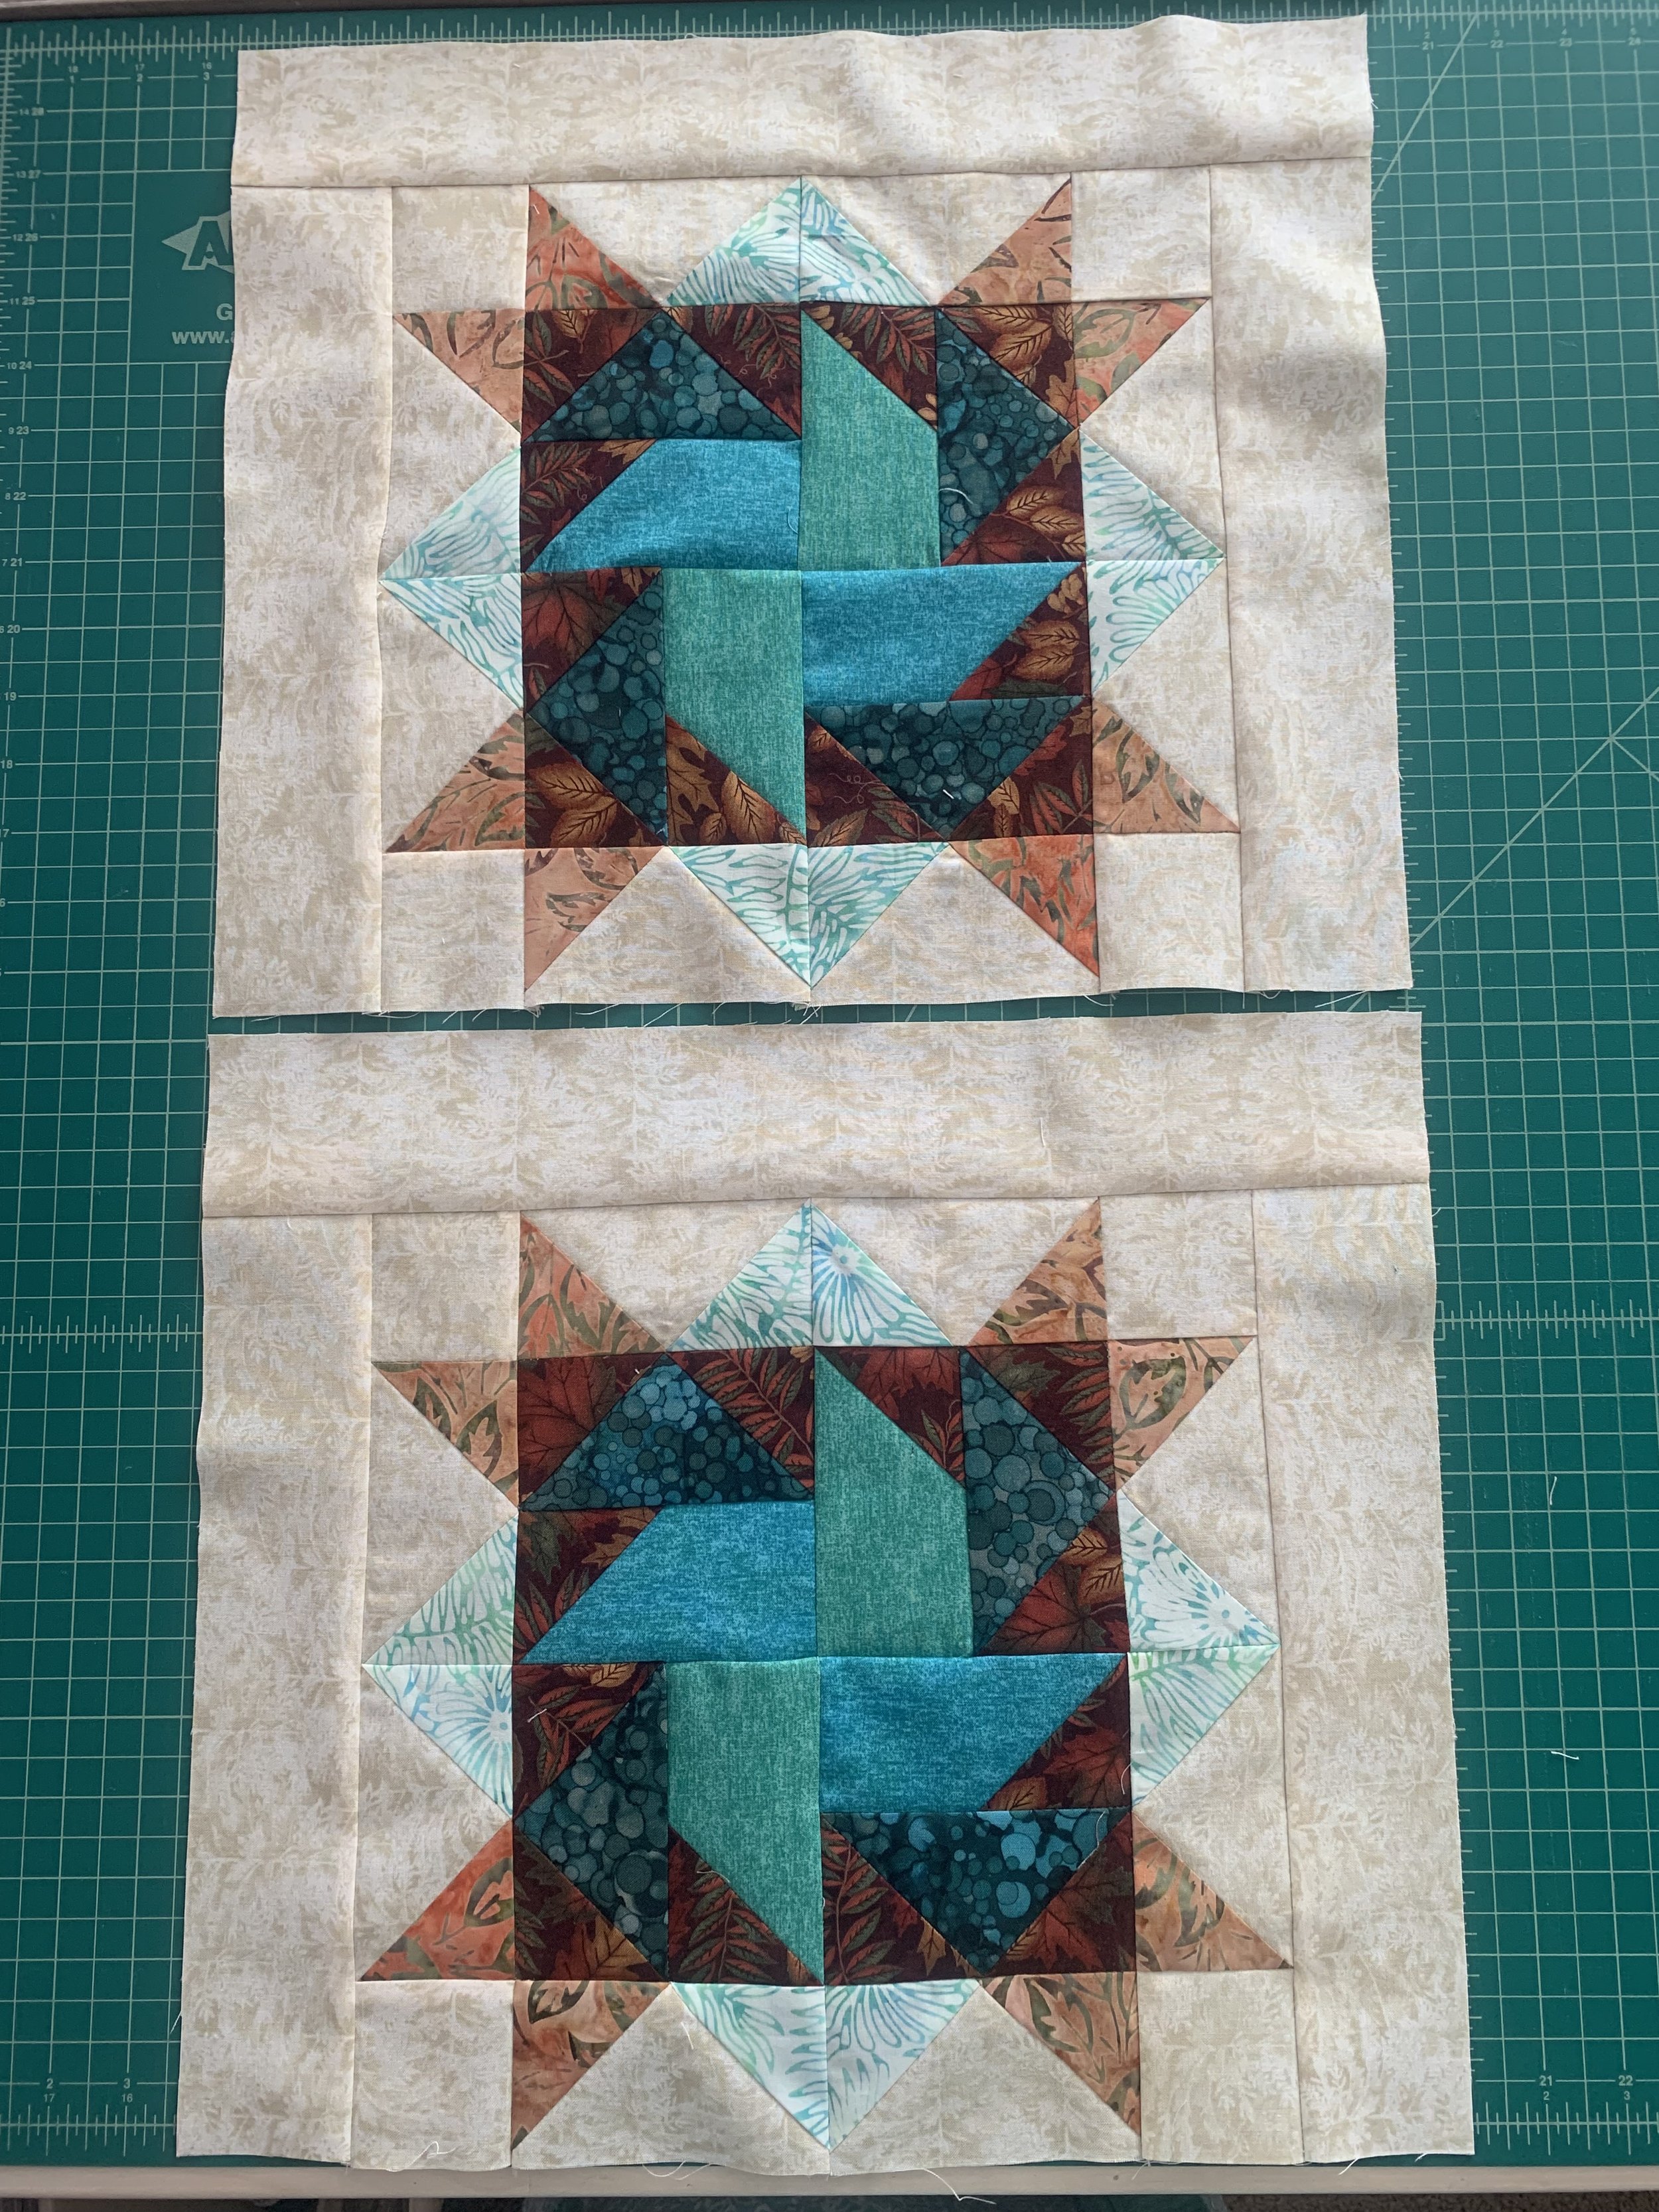
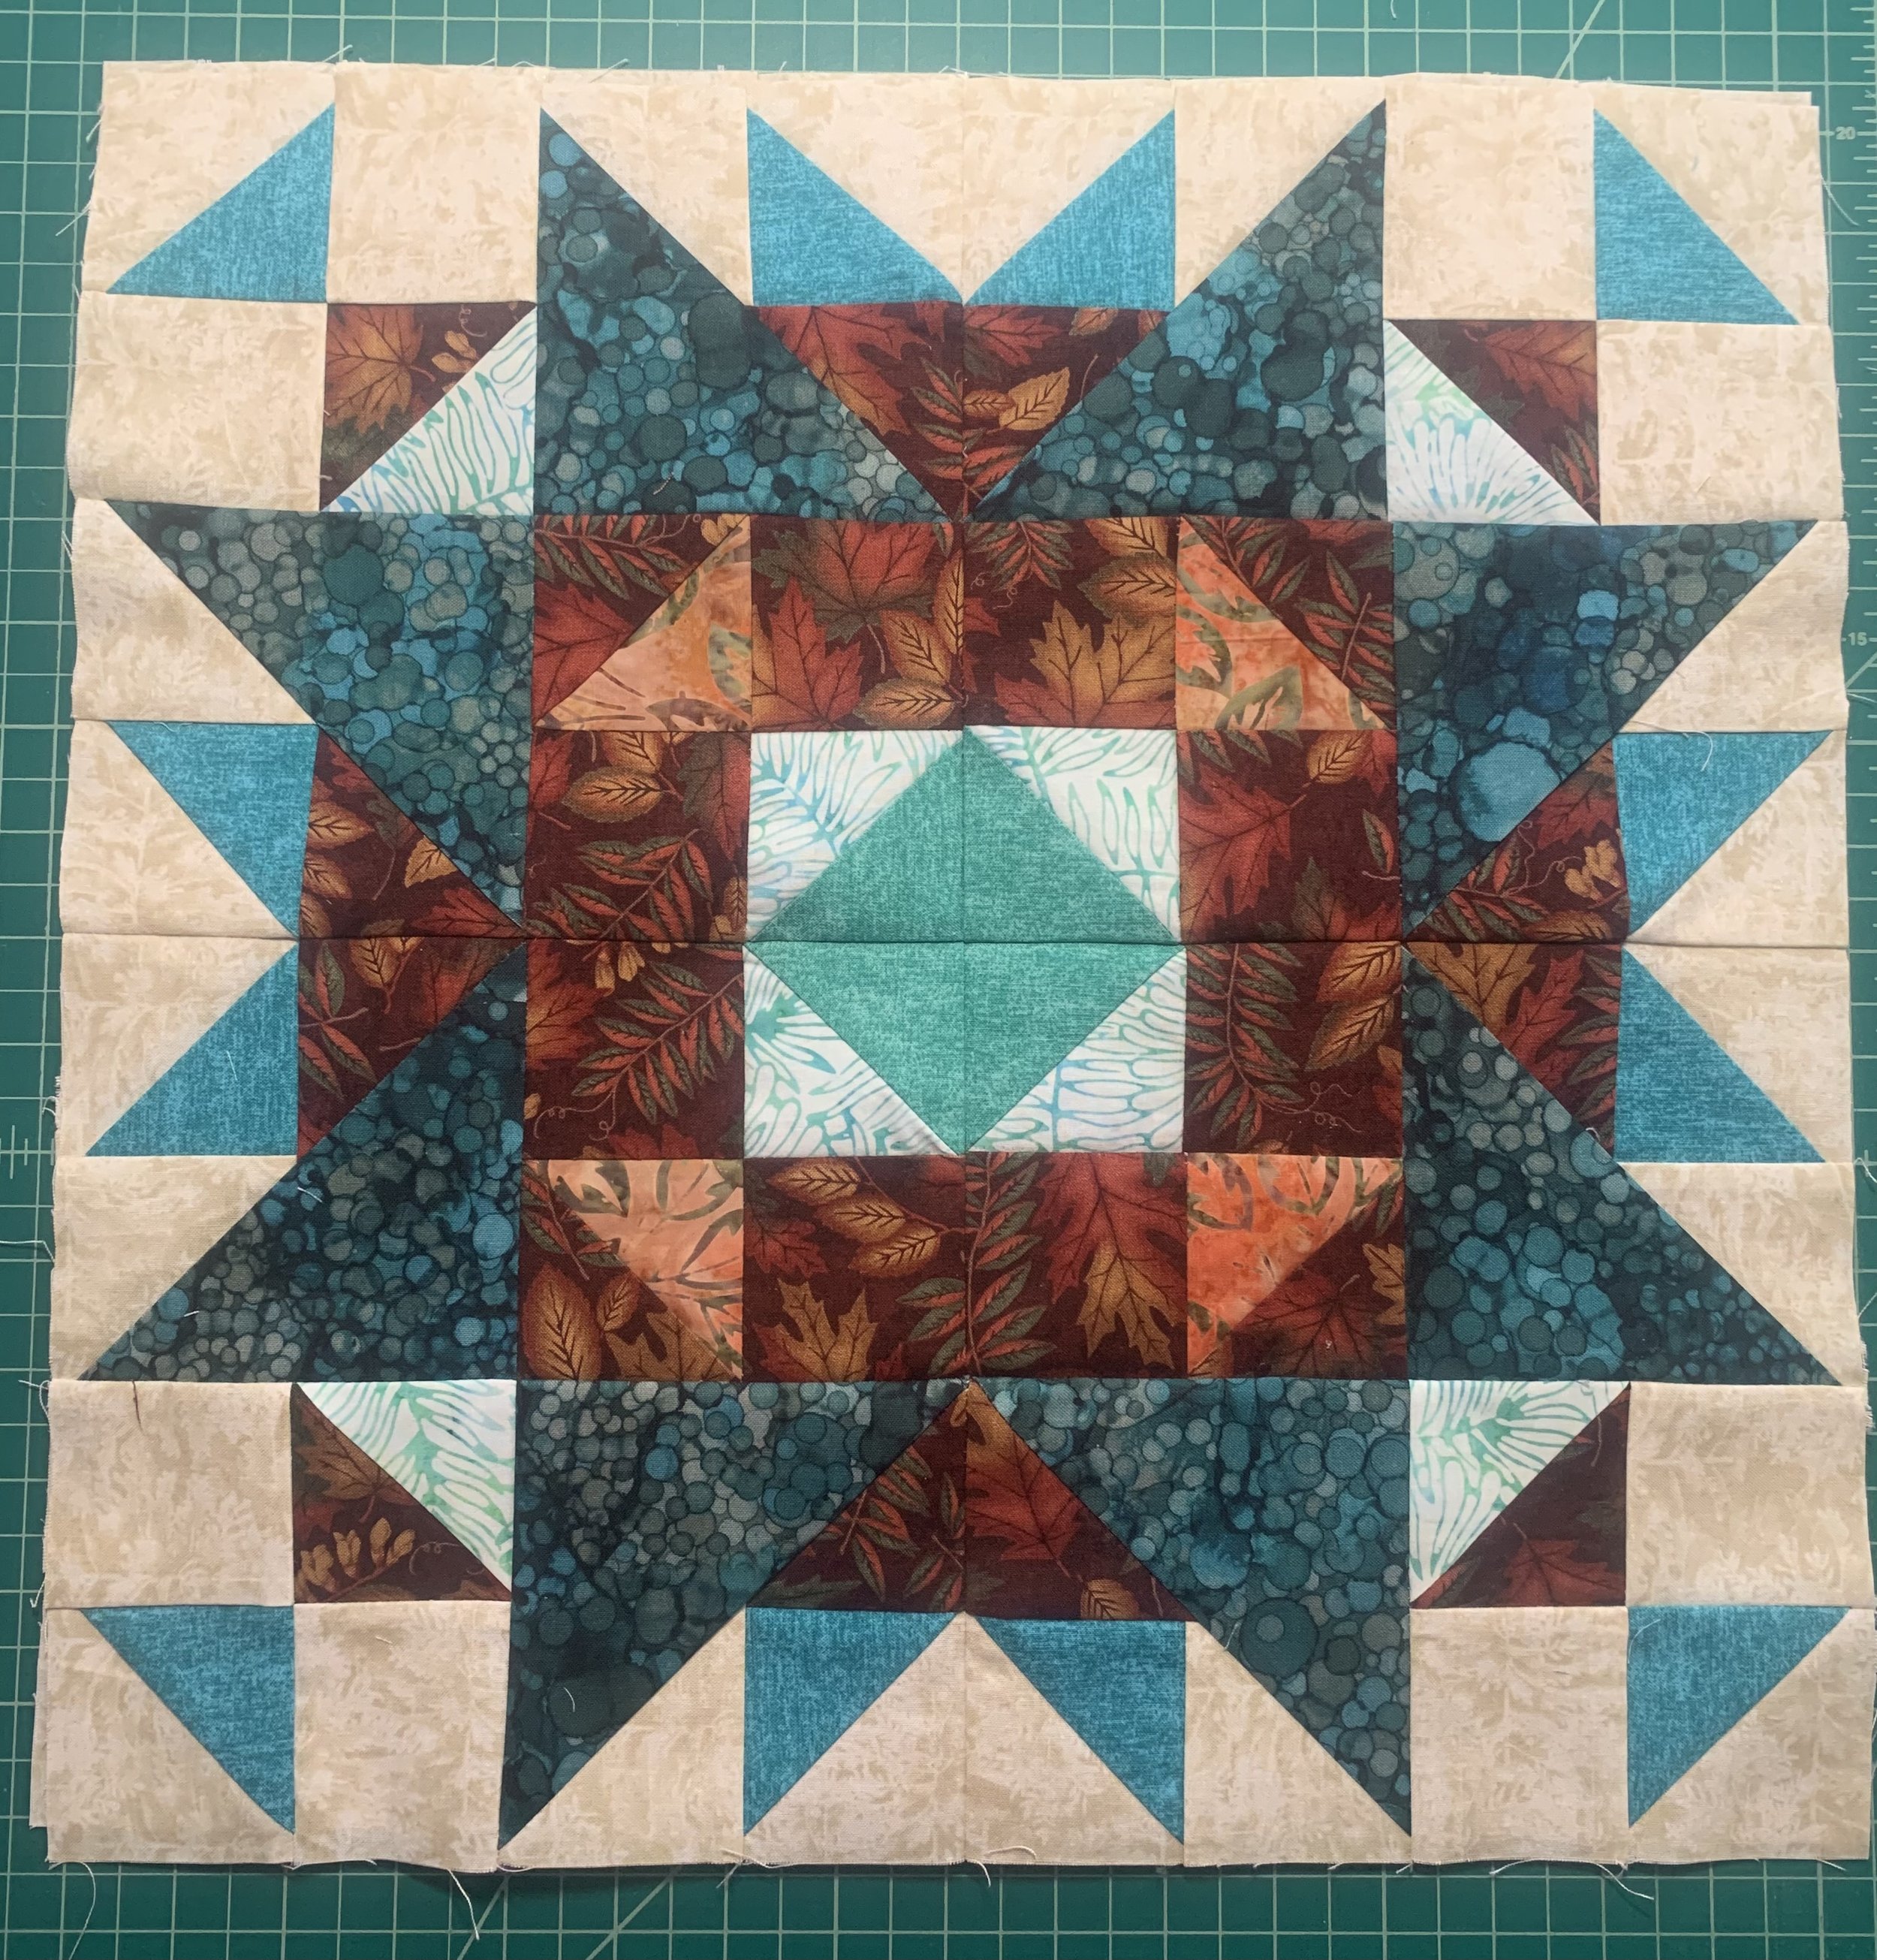
For the next 4 months, we made bigger, more complex blocks, and we made two of each. In one set of them I ended up making a mistake - switching around two of the colors. I discovered my mistake after I had pieced, sewn, blocked, ironed, trimmed, framed, ironed and trimmed again - so the mistakes are staying! I’m not ripping them out, and I doubt any non-quilter would even know. (I’m not submitting this for any kind of contest, either!) These next blocks we made were Double Dutch Pinwheel, Bursting Star, Feathered Sawtooth, and Churndash Star.
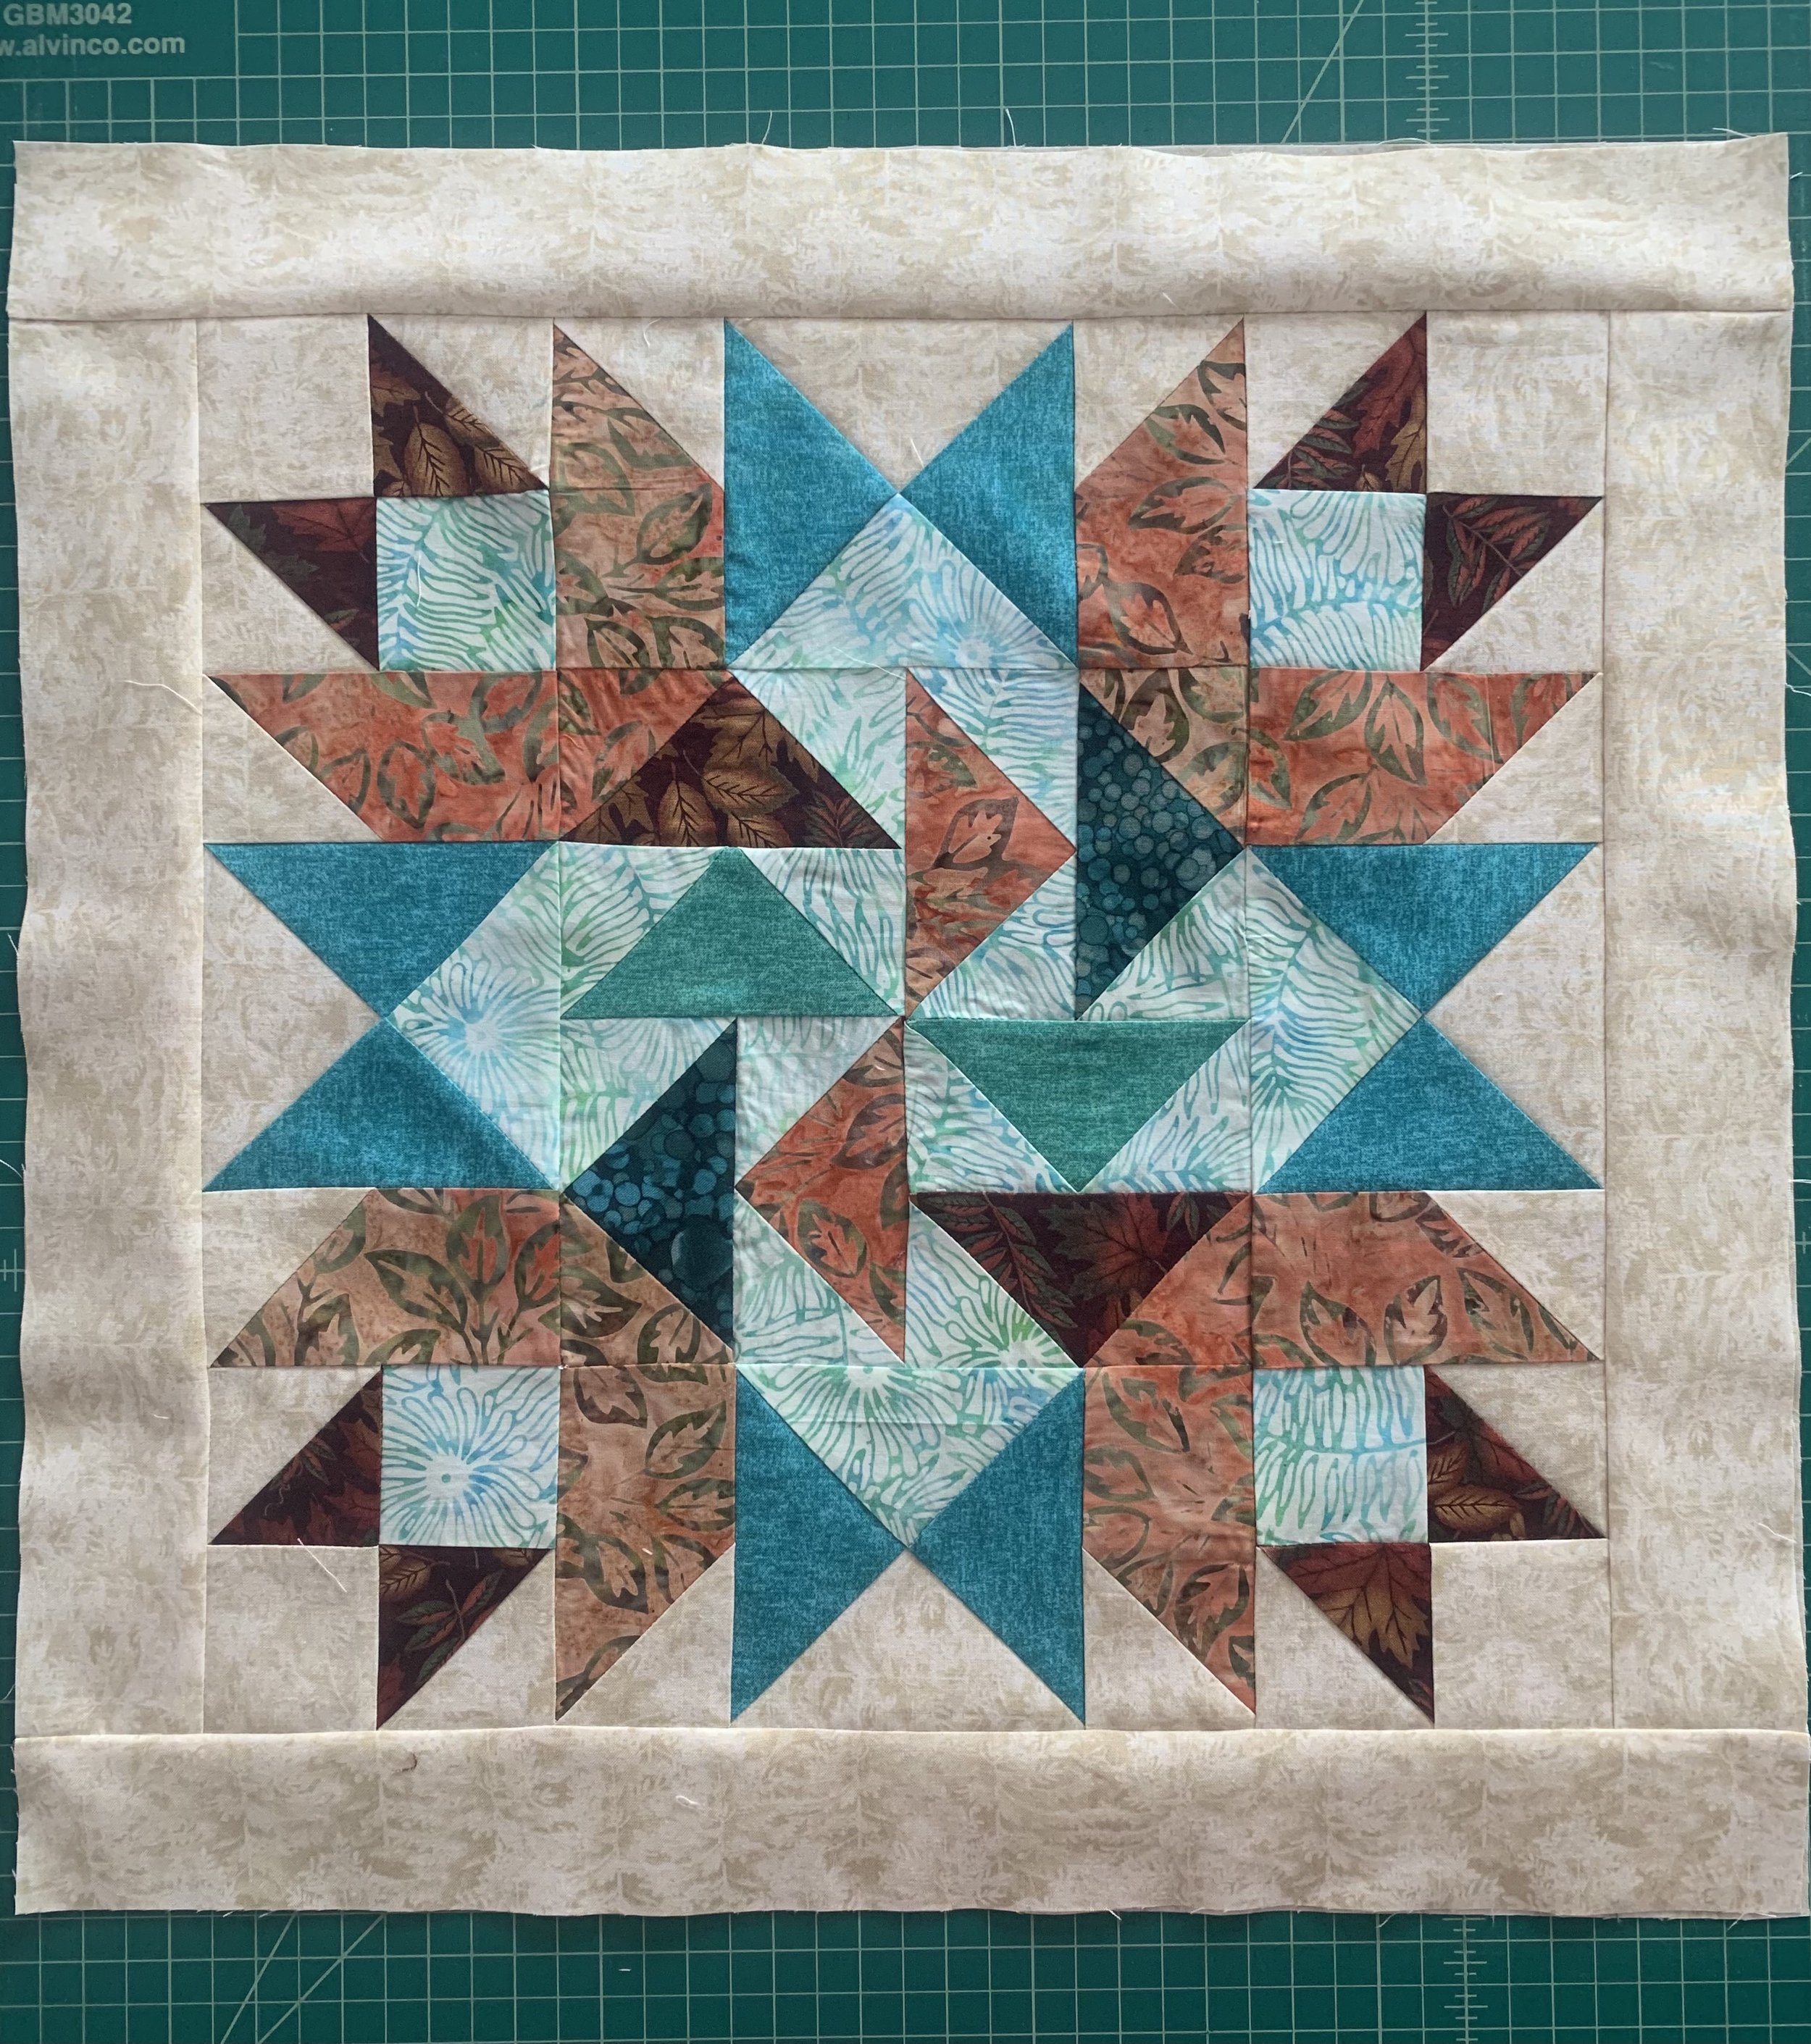

The final block, the showpiece of the quilt, was a Mariner’s Compass. This is particularly tricky because of the very sharp points. It’s difficult to cut and sew those points! The points can very easily shred, or get pulled down into the bobbin case and snarled with thread. The way Scott Flanagan solved these pitfalls was to give us paper piecing instructions. Essentially, you use paper guides to cut your fabric - you just pin the fabric right to the paper and sew and cut your pieces with the paper pattern attached. You rip off the paper after the block is sewn together. You do end up with beautiful sharp points! I was slightly grumpy about the fussiness of this method until I saw the results!
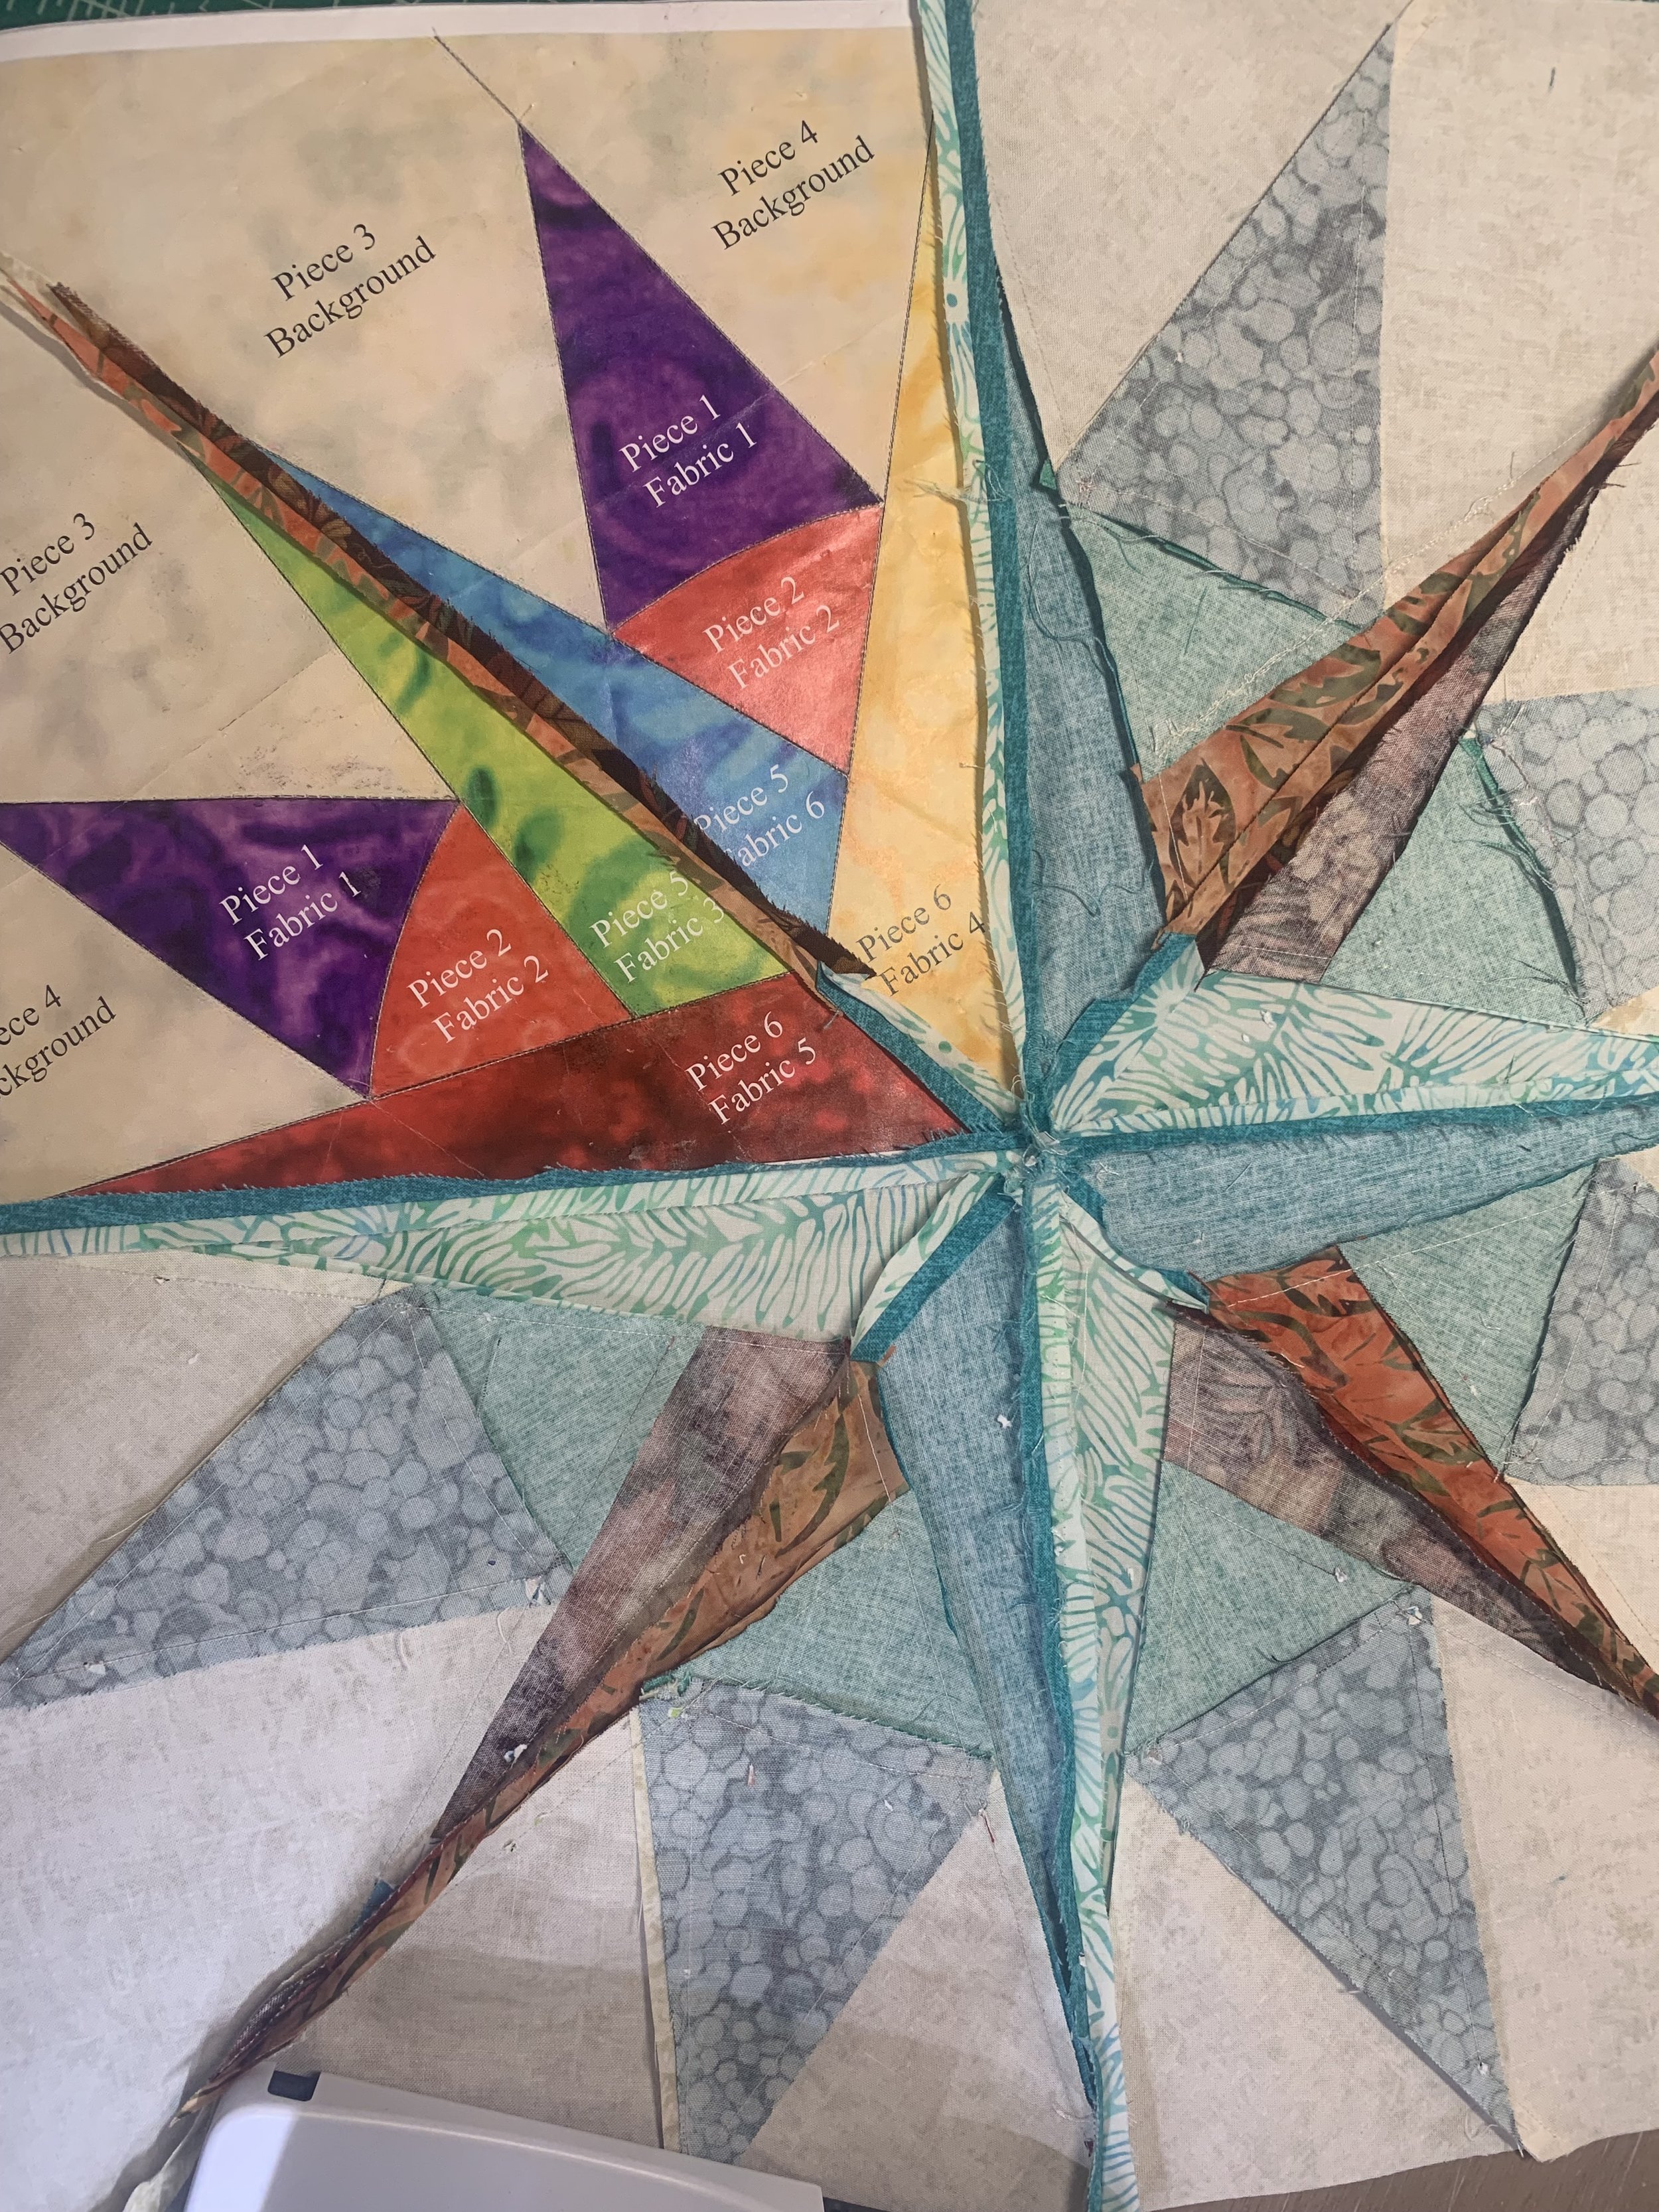
Paper piecing as seen from the back with paper still attached to one quadrant.
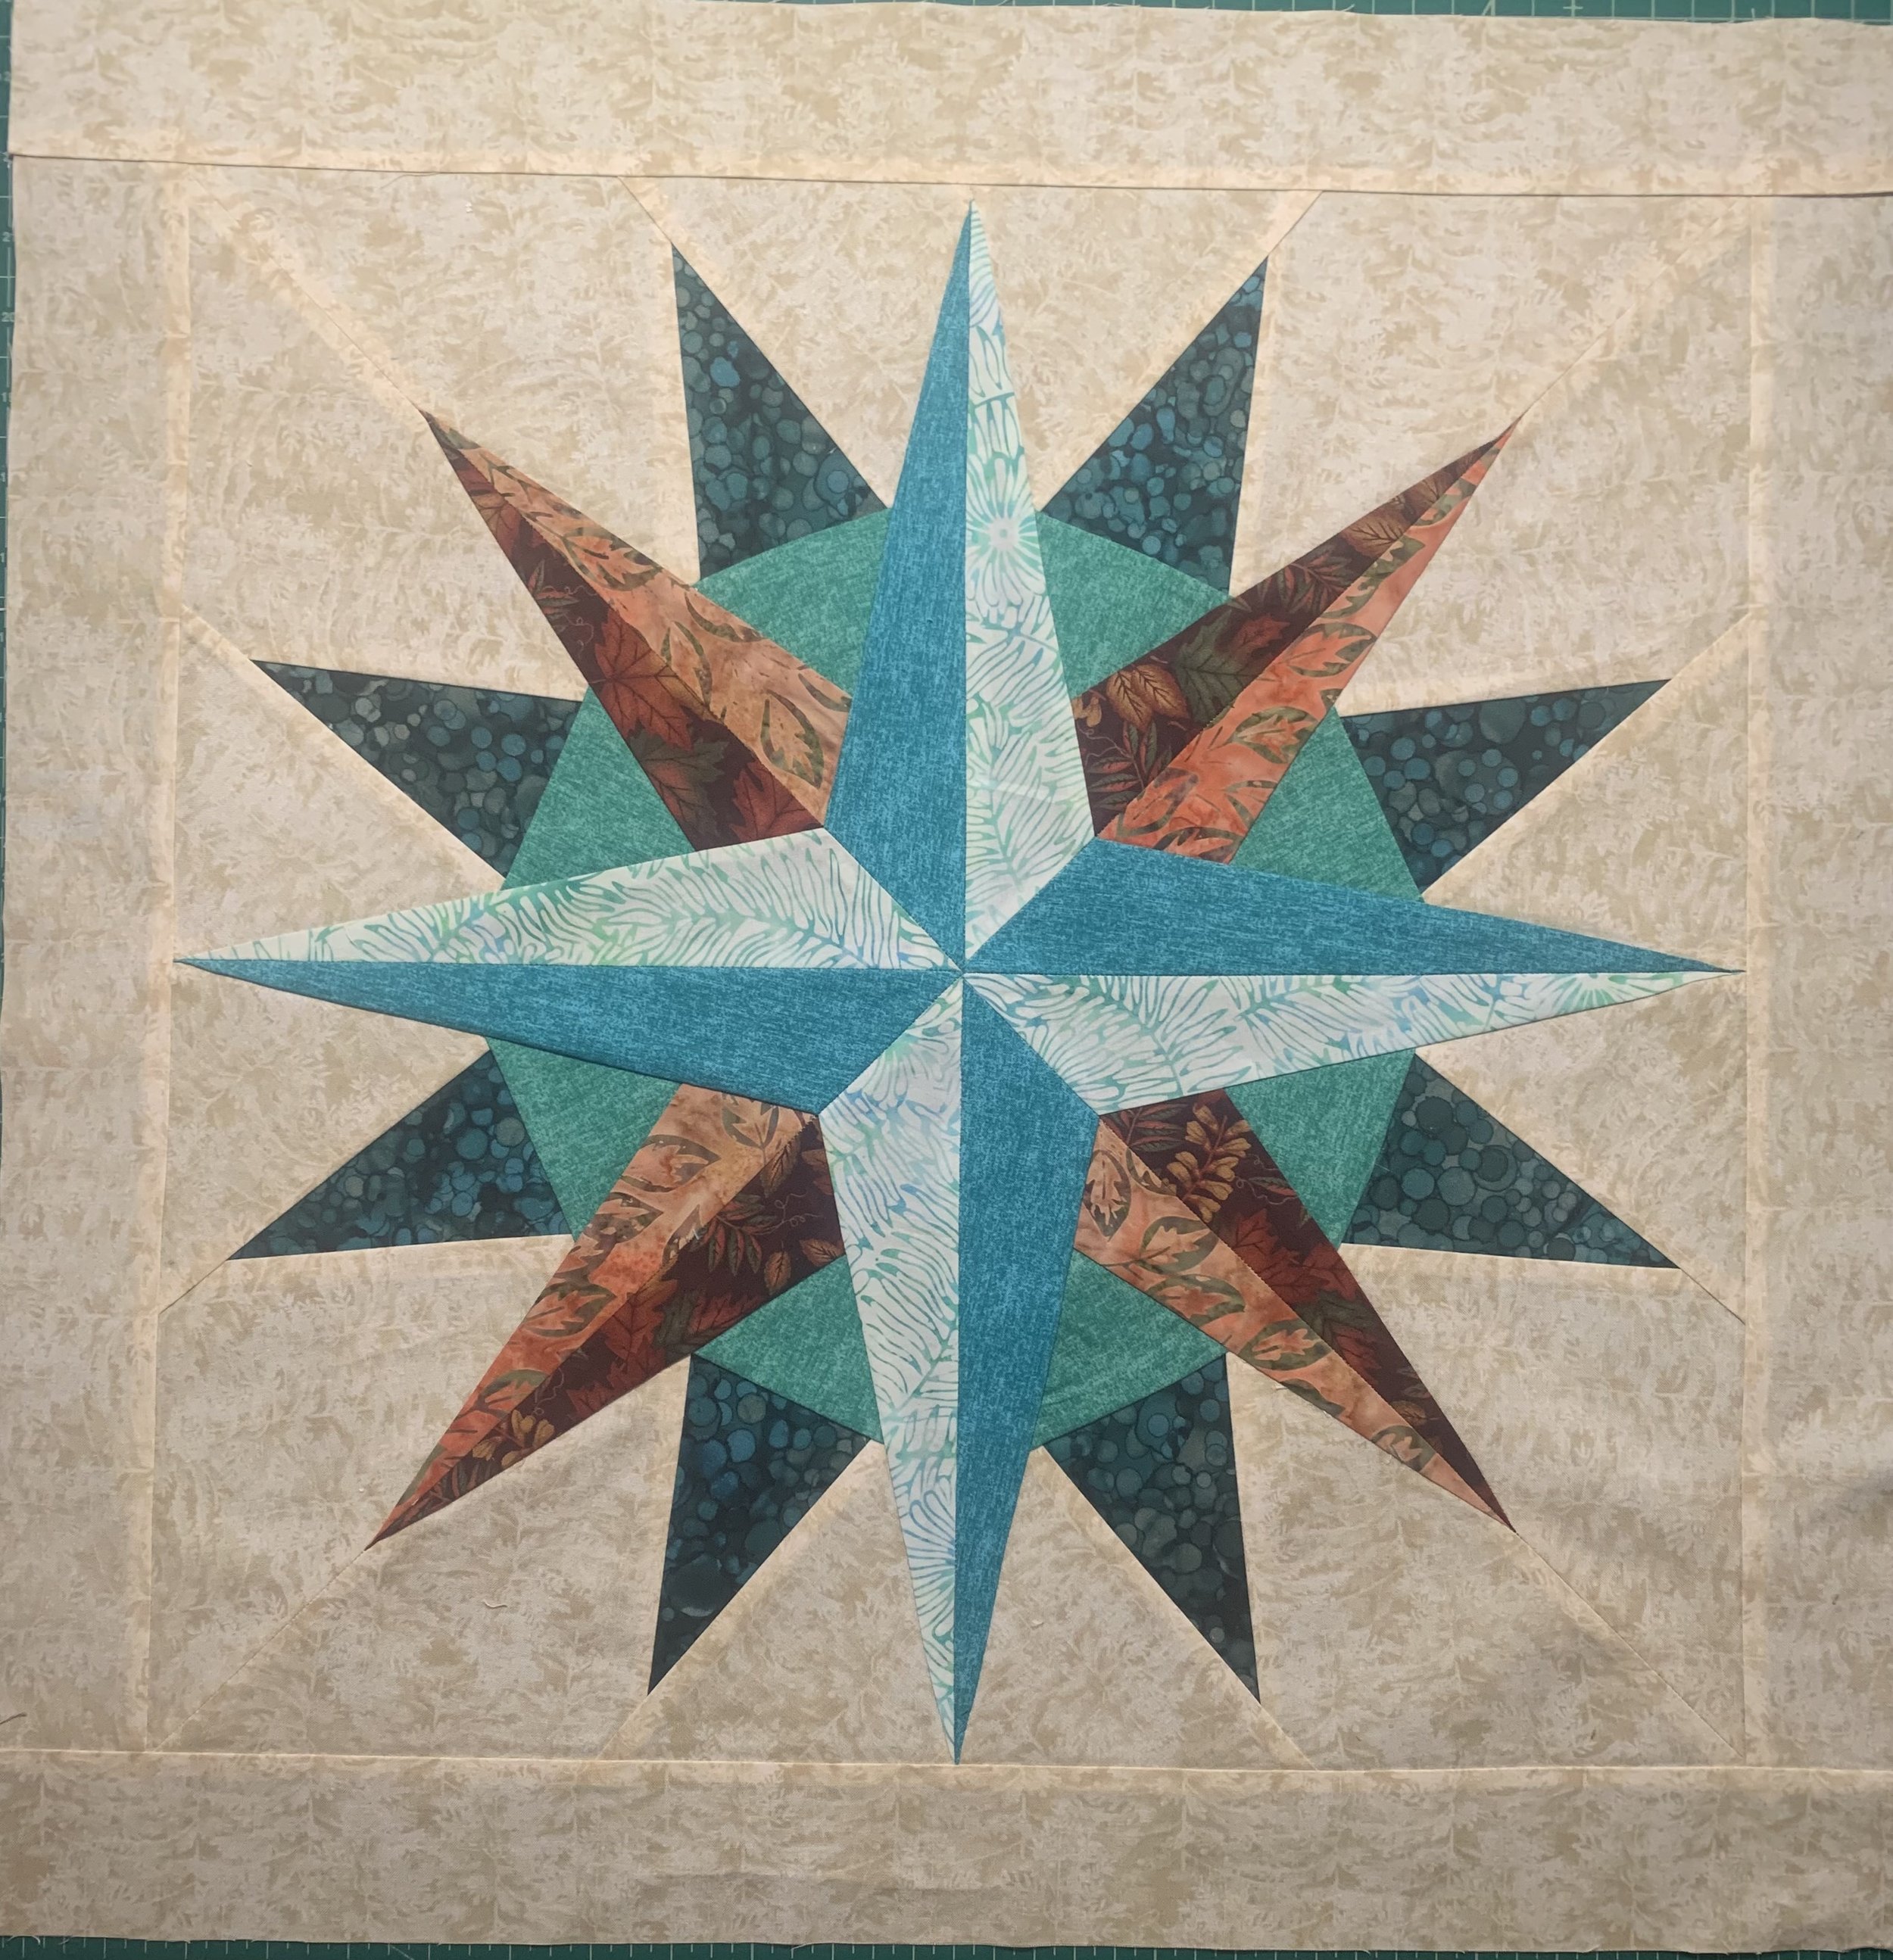
Mariner’s Compass, made with the paper piecing method.
Epilogue
I have to say, I was really thrilled and proud of myself when I got these blocks completed and then sewn together. The quilt blocks get put together in quarters, then the quarters put together, and then squared up with the setting fabric. I wasn’t sure if I would enjoy this project to the end, but I did.
After we had our class show and tell, I bought the supplies I would need to quilt this myself. I hope I can do this! For now I’ve set it aside while I’ve been tackling other classes and projects, but I bought my batting and my backing fabric, and I bought several spools of different thread colors that I’ll test out on the scraps I have left over. I have to tell you - I am seriously wanting a dedicated quilt machine now!