Domestika Lantoki Dress Shirt
The Project
I've been looking for a project that both lets me practice garment-making skills and that uses fabric from one of my Spoonflower designs. I found this project in Dressmaking: Design Your Own Shirt, a course by Lantoki, through the learning platform Domestika.
Additionally, I knew I would need to make pattern adjustments. I'm not very tall, and so I have to be able to move details like where the waist is, or changing the sleeve, or changing the neck opening. This then leads to other changes such as dart positions and and dart sizes.
The Class
The class, Dressmaking: Design Your Own Shirt, a course by Lantoki , is the first class I've taken from the Domestika learning platform. I was very intrigued by way classes were recorded in video segments inside of units. The teachers are available for questions, but I never needed to ask. This particular course was taught in Spanish, with English subtitles available. Some of the subtitles weren't quite accurate. I found that I understood what was meant anyway and didn't have any difficulties.
The teachers take the students through the entire process. How to print up and assemble the pattern, choosing fabric, even using your sewing machine. They also go over how to make some simple adjustments, such as changing the shaping, or changing the sleeve.
The videos were in small, watchable increments. You can rewatch each video as many times as you need. You can use the slider on the play bar to advance the video to exactly the part you want to see again. I would watch several videos, and then take some time to think about them. I also spent time in between videos to research additional alteration strategies.
My Fabric
I was excited to try making a piece of clothing using one of my fabric designs. Because I wanted to make a lightweight shirt, I chose a lightweight and crisp fabric, cotton lawn. When you order fabric from Spoonflower, you use a drop-down menu to choose what type of fabric you want to have the design printed on. Then you use another drop-down menu to select the amount you want to order, in yardage. I decided I wanted to use my Small Leaf Pearls Black design.
I was very pleased with the way the cotton lawn fabric handled. It was crisp enough to work with cutting and pinning and sewing. It had enough body to make a nice dress shirt. It's heavy enough to be a regular garment, and airy enough to be breathable. I can wash it in the washer, and I can also put it through the dryer. I did pre-wash my yardage before sewing. After I made my garment, I washed it again, this time on a gentle cycle, and I air-dried it, to be gentle on the stitching and the buttons.
My Dress Shirt Shirtdress
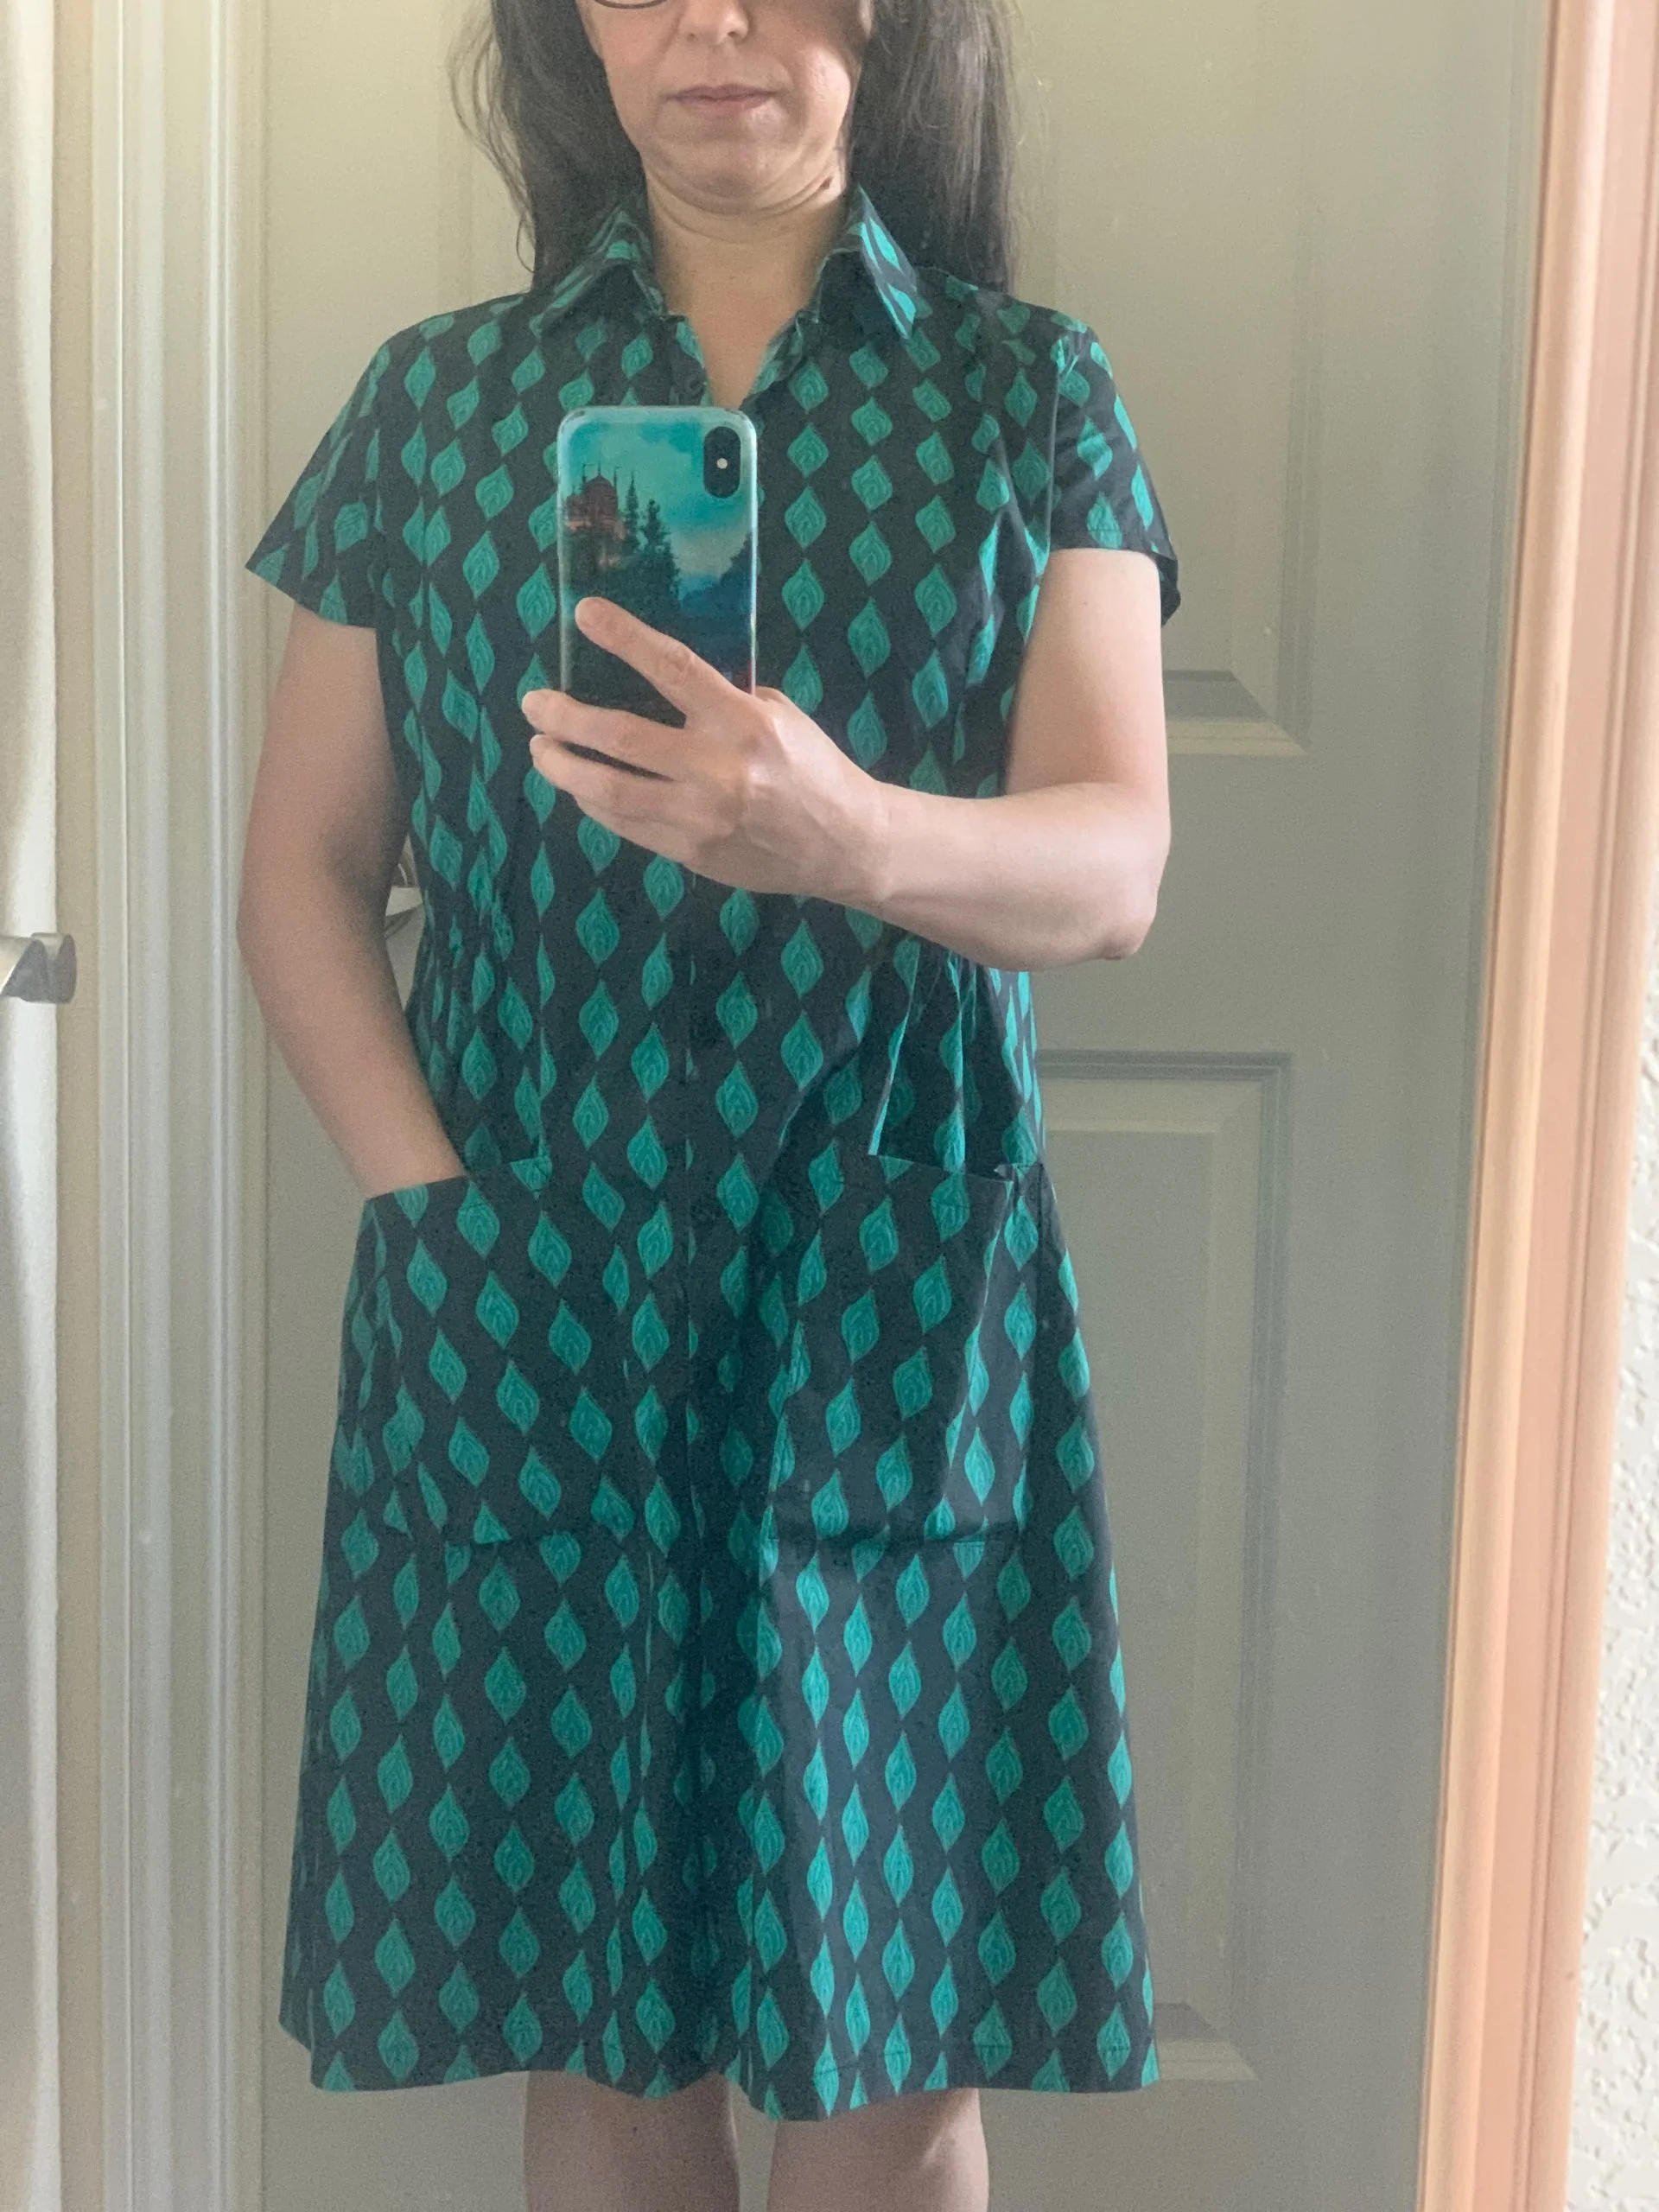
One of the options that the Lantoki teachers presented was to change the length of the shirt, even long enough to make a dress. I decided to try this option, and I also changed the sleeves to be short sleeved. The teachers explain how to adjust for short sleeves. Here are a couple of pictures of my finished project!

Here's the front of my dress - I have pockets!

Here's the back of my dress plus a close up on the edge of my fabric. I added some gathering at the back waist.
I had to make a lot of adjustments for proportions. One adjustment is that I had to raise the waist shaping by around 8 to 9 inches. This meant I had to also change the location of the bust darts. Moving the bust darts meant I had to make the the armscyes (arm holes) smaller. Making the armscyes smaller meant that I had to change the shape of the sleeve.
I also had to choose a size to accommodate a fuller bust. This meant I had to make alterations in the shaping so that my dress looked like a dress, and not like a large smock. I reduced some sizing at the side seams along the waist. Additionally, I made the darts a little bigger both front and back. In the end, I also added some elastic with gathering at three places on the waist to really make my project look like a dress.
Buttons! Pockets!
The last changes I made were to the button distances and to the pockets. I have struggled with button-down shirts and gaping plackets between the buttons. In the hope that the tightly spaced closures would be more secure, I decided I would try placing all the bodice buttons very close together. After the first time I wore my dress all day, I would say that strategy was a success! I tried on the dress and took photos before I trimmed all my threads, but you can still see what I mean in the picture below:

I placed the buttons on the skirt part of my dress slightly farther apart than they would be on a shirt, since there shouldn't be any strain on the closures here. *And*, I added pockets! The original pattern from Lantoki has an optional shirt pocket on the chest. When I made all my adjustments to shorten the top, there really wasn't comfortable space left for a pocket.
Instead, I decided I would add hand pockets! I thought about putting them in the side seams for hidden pockets, but I had enough of my Small Leaf Pearls Black fabric that I was pretty sure I could put really big pockets on the outside. In fact, I had enough fabric that I could fussy cut the pockets. What that means is that I matched the printed pattern on the pocket pieces to the places I wanted them to be on my dress. I cut them out so that with the seaming added and sewn onto the front of the dress, the pockets blend in. It looks nice if I may say, and this lets my fabric print really stand out. Here is a close up of the skirt button spacing and of the pockets:

Do I Like It?
Yes! I am very happy with the whole project. Making all the adjustments was challenging, but the results are satisfying. Domestika was an easy platform to use, and I enjoyed the Lantoki teachers for this course in particular. I was thrilled to finally make a garment using my own Small Leaf Pearls Black fabric from Spoonflower. The cotton lawn fabric is crisp and wearable, washable and easy to handle. I would do this all over again.